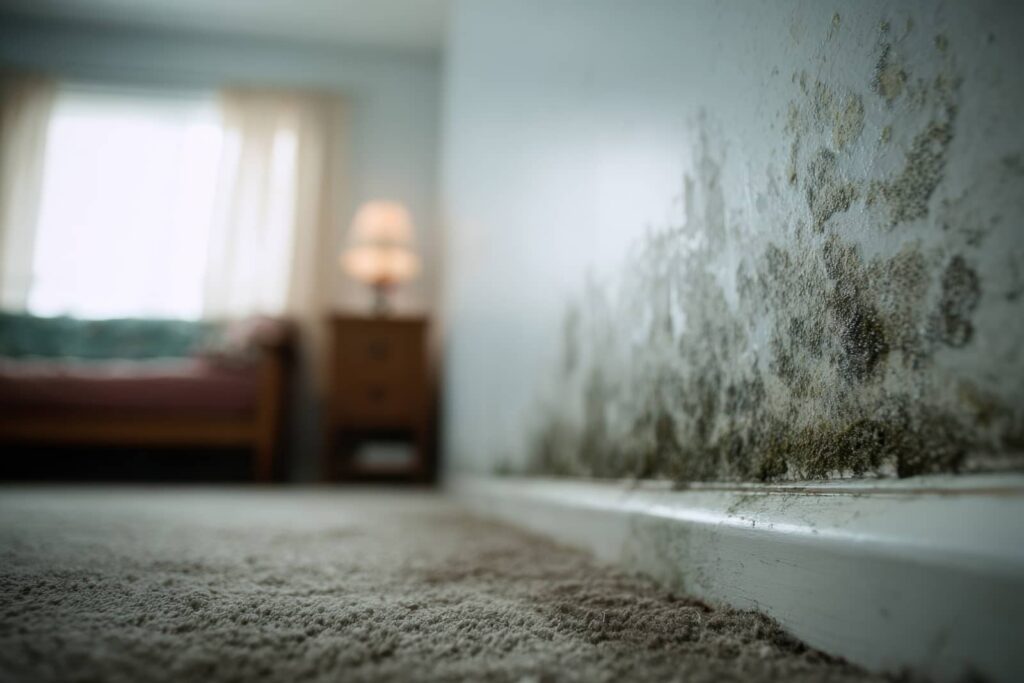
When you face black mold, the remediation process starts by identifying the affected area and isolating it to limit spore spread. You’ll see porous materials removed, surfaces cleaned and sanitized, and moisture sources traced back to the cause. Professionals then use containment barriers and negative air pressure to control airborne contamination. The real challenge comes next, because stopping regrowth depends on how well each step was done.
Key Takeaways
- Inspect the area, identify mold-affected materials, and isolate the contaminated space before cleanup begins.
- Set up containment with plastic barriers and negative air pressure to stop spores from spreading.
- Remove porous materials that cannot be cleaned, then bag and dispose of them according to local regulations.
- Clean and disinfect remaining surfaces, while addressing the moisture source and drying the area thoroughly.
- Repair with mold-resistant materials, verify humidity is controlled, and complete a final inspection before reoccupying.
What Black Mold Remediation Involves
Black mold remediation involves a controlled, step-by-step process to remove contamination and prevent it from returning. You begin by identifying affected materials, then you isolate the area, remove porous items that can’t be cleaned, and treat remaining surfaces with targeted cleaning agents.
In the black mold remediation process, you also track moisture sources, because damp conditions let spores rebound. You’ll inspect hidden spaces, dry the structure, and verify that no active growth remains before restoration starts.
This method protects your home and helps you feel confident that your space is being restored safely. When you follow each stage carefully, you join a practical routine that supports lasting control, cleaner indoor air, and a healthier environment for you and everyone in your household.
Professional Black Mold Containment Steps
You’ll see professionals set up containment barriers to isolate the affected area and limit spore spread during remediation.
They’ll seal openings with plastic sheeting and controlled entry points so airborne contamination stays confined.
Then they’ll establish negative air pressure with HEPA-filtered equipment to pull air into the work zone and prevent mold from escaping.
Containment Barriers
Containment barriers isolate the affected area so mold spores don’t spread during remediation. You’ll usually see polyethylene sheeting sealed with tape around doors, vents, and openings, creating a defined work zone.
You should verify every seam, corner, and floor edge, because even small gaps can let contamination escape. Install zipper doors or access flaps so your team can enter without breaking the barrier.
If the space includes fixtures or built-ins, wrap them separately to keep clean areas protected. You also need to label the boundary clearly, so everyone on site understands where remediation starts and stops.
When you follow these steps carefully, you help your crew work together safely, maintain control, and protect the rest of the property from avoidable exposure.
Negative Air Pressure
Once the containment barriers are in place, professionals create negative air pressure so air flows into the work zone instead of out into clean areas. You’ll see this done with HEPA-filtered air scrubbers that exhaust contaminated air safely outside. This pressure differential helps protect your home and keeps spores from migrating into occupied spaces.
It keeps the contained area under controlled airflow.
It reduces cross-contamination during removal.
It supports safer, cleaner restoration work.
Technicians monitor the setup with manometers or smoke tests, adjusting equipment until airflow stays correct. If you’re part of the remediation process, this step gives you confidence that the work zone stays isolated, your household stays protected, and the team can remove mold with greater precision and less spread.
Black Mold Removal and Disposal
Removing black mold starts with careful handling of affected materials and surfaces to prevent spores from spreading.
You should remove porous items that can’t be reliably salvaged, such as damaged drywall, insulation, and carpeting, and place them directly into sealed bags or wrapped plastic.
Work methodically, keeping debris contained as you detach and load materials.
Wear appropriate PPE, and use dedicated tools so you don’t cross-contaminate clean areas.
If you share a workspace with others, keep them out of the zone until disposal is complete.
Transport waste promptly to a designated disposal site that accepts contaminated construction debris.
Label bags clearly when required, and follow local regulations for handling mold-affected materials.
How to Clean and Sanitize the Area
You should choose a cleaning solution that matches the affected material and is approved for mold remediation, then apply it according to the manufacturer’s instructions.
After that, you’ll disinfect all cleaned surfaces thoroughly to reduce residual contamination and prevent regrowth.
Finally, you should use safe drying methods, such as controlled ventilation and dehumidification, so moisture doesn’t remain in the area.
Choosing Cleaning Solutions
Choosing the right cleaning solution is critical because black mold cleanup requires more than wiping visible growth away. You should select a cleaner that matches the surface and the contamination level, so your work stays controlled and effective. Use non-porous-safe products that loosen residue without damaging materials or adding excess moisture.
Choose a detergent solution for routine surface cleaning.
Use EPA-registered mold cleaners when labels specify mold treatment.
Avoid mixing chemicals, since that can create unsafe fumes.
You’ll get better results when you apply the solution with a disposable cloth or sponge and change tools often.
Work methodically, section by section, so you and your team keep the area organized and consistent. This approach helps you stay aligned with best-practice remediation steps.
Disinfecting Surfaces Thoroughly
After the visible mold is removed, disinfect the cleaned surfaces to reduce any remaining spores and help prevent regrowth.
You’ll want to work methodically, so apply the chosen disinfectant exactly as labeled, covering seams, corners, and other porous-free surfaces where residue can linger.
Keep the surface visibly wet for the full contact time; that step lets the product do its job.
Use clean microfiber cloths or disposable wipes, and change them when they become soiled to avoid spreading contamination.
If you’re treating an area with multiple materials, clean each one separately so you don’t cross-contaminate nearby rooms.
Inspect the surface under good light when you’re done, and repeat disinfection on any spots that still show staining or residue.
Working this way helps your space feel restored and safe.
Safe Drying Methods
Once disinfection is complete, dry the area with controlled airflow and low humidity so moisture doesn’t remain trapped in seams, cavities, or porous framing.
You’ll support safe cleanup by positioning air movers to sweep damp surfaces, not blast debris into the space. Use dehumidifiers to pull vapor from the air and keep relative humidity below 60%. Check hidden voids, insulation edges, and subfloor joints with a moisture meter until readings stabilize.
- Remove wet materials that can’t dry fully.
- Ventilate the space without spreading spores.
- Verify dryness before rebuilding.
When you work methodically, you protect your crew and help your home rejoin a healthy, stable environment.
Moisture Control to Prevent Regrowth
Moisture control is the key step that prevents black mold from returning after remediation. You need to keep indoor humidity below 60%, because spores stay inactive in dry conditions.
Use exhaust fans in bathrooms and kitchens, run dehumidifiers in damp areas, and confirm that HVAC condensate drains freely. Check for leaks under sinks, around windows, and at plumbing joints, then fix them right away.
If your space has a crawlspace or basement, you should monitor it with a hygrometer and inspect it regularly after rain.
Maintain steady airflow by keeping vents clear and furniture spaced from walls. When you track moisture sources consistently, you protect your home, support your team’s work, and reduce the chance of hidden regrowth.
Restoring the Space Safely After Remediation
With the contaminated materials removed and the area fully cleaned and dried, you can begin restoring the space by replacing damaged building components with mold-resistant or unaffected materials.
You’ll want to inspect framing, insulation, drywall, and flooring before reinstalling anything. Use moisture-tolerant products, seal gaps, and verify that surfaces stay dry during repair. This helps your home feel whole again while lowering future risk.
- Choose materials rated for wet areas.
- Reinstall only after humidity stays controlled.
- Confirm ventilation works before finishing surfaces.
You should also document each step, so you and your team can track what was replaced and why.
Finish with a final inspection and, if needed, professional testing. That way, you can reoccupy the space with confidence and belong in a healthier environment.
Frequently Asked Questions
How Long Does Black Mold Remediation Usually Take?
You’ll usually need one to five days for black mold remediation, though severe infestations can take longer. You’ll help speed it up by ensuring access, controlling moisture, and allowing thorough drying, cleaning, and restoration.
Does Insurance Cover Black Mold Remediation Costs?
Coverage is a maze: you’ll get payment if a sudden, covered event caused the mold, but insurers often deny gradual moisture damage. You should read your policy, document losses, and file claims promptly.
Can I Stay Home During Black Mold Remediation?
You can sometimes stay home, but you shouldn’t if crews isolate the area, use negative air, or remove contaminated materials. You’ll be safer elsewhere during active remediation, especially if you’re sensitive or symptoms worsen.
How Much Does Professional Mold Testing Cost?
You’ll usually pay $300 to $700 for professional mold testing, though complex inspections can cost more. You’ll get air and surface samples, lab analysis, and a report that helps you plan safe remediation.
When Should I Call a Mold Specialist Immediately?
You should call a mold specialist immediately when you smell persistent mustiness, see visible growth, or have water damage. Don’t audition as a fungus whisperer; you’ll want containment, moisture control, and safe cleanup fast.
Summary
When you tackle black mold remediation, you’re not just cleaning a stain—you’re removing a contamination source and stopping it from coming back. You’ll isolate the area, dispose of unsalvageable porous materials, sanitize remaining surfaces, and fix the moisture problem that fed the growth. It may seem like overkill, but containment and proper drying protect the rest of your space. Once the area’s verified safe, you can restore it with confidence.