
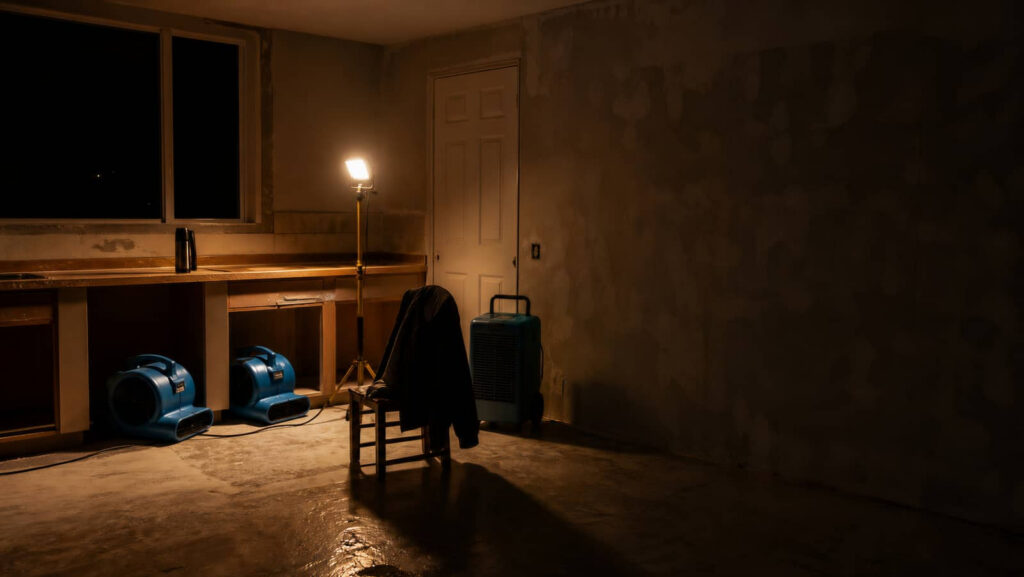
When you hire professionals to repair water damage in your home, they first inspect the affected areas, trace the leak, and document what they find. They then stop the source, contain the damage, and use drying equipment to remove hidden moisture from walls and floors. Unsalvageable materials come out next, but that’s only part of the process before sanitation, mold checks, and full restoration can begin.
Key Takeaways
- Professionals inspect the damage, trace the leak source, and document affected walls, floors, ceilings, and belongings.
- They stop the water source, protect nearby areas, and shut off power to reduce further damage and safety risks.
- They dry the home using air movers, dehumidifiers, and moisture testing to prevent mold and hidden damage.
- They remove unsalvageable materials like soaked drywall or insulation, then sanitize remaining surfaces with approved cleaners.
- They complete a final inspection, verify moisture levels and system function, and rebuild with durable, corrosion-resistant materials.
Inspect the Water Damage and Source
Before you begin any repairs, you need to inspect the visible damage and identify the source of the water. You’ll document stained drywall, warped trim, swollen flooring, and damp insulation, then map the affected area with a moisture meter.
Look for changes in texture, odor, and discoloration, because those cues help you trace hidden spread behind surfaces. Check ceilings, walls, baseboards, and adjoining rooms to understand the full impact.
This inspection shows how professionals repair water damage by separating surface symptoms from the actual entry point. In a skilled team, you’ll use this step to decide what’s salvageable, what needs removal, and where contamination risks may exist.
Accurate assessment keeps your work focused, efficient, and aligned with proven restoration standards.
Stop the Leak and Protect the Home
First, locate the leak and shut off the affected water supply or main valve to stop further intrusion.
Then, isolate the damaged area by moving contents, lifting rugs, and covering nearby surfaces with plastic sheeting or tarps.
These steps limit spread, reduce secondary damage, and prepare the home for drying and repair.
Locate The Leak
Once you spot water damage, locate the source fast and stop it to limit further harm.
You’ll work like a pro when you trace the path back from the wettest point, checking ceilings, walls, floors, and plumbing fixtures. Listen for running water, watch for drips, and feel for damp joints.
If the leak hides behind a wall or under a floor, inspect visible supply lines, drains, roof penetrations, and appliance connections.
- Check under sinks
- Inspect toilet seals
- Examine supply hoses
- Trace ceiling stains
- Test shutoff valves
You belong in the repair process when you document the source and confirm the leak has stopped before moving on.
Precise locating saves time, reduces demolition, and helps your restoration team plan the next step with confidence.
Protect Nearby Areas
After you shut off the water source, protect the surrounding area so the damage doesn’t spread. Move furniture, rugs, electronics, and loose décor out of the affected zone, then place them on dry, elevated surfaces.
Lay plastic sheeting or waterproof tarps over clean flooring and valuables to block splashback and tracking. If water is still migrating, use towels or absorbent pads to create temporary barriers at doorways and baseboards.
Lift drapes and remove wall hangings near wet walls to prevent secondary staining. You should also unplug nearby electrical devices and keep cords off damp floors.
These steps give you and your home a safer recovery path while professionals assess moisture, contain the loss, and prepare for drying, removal, and restoration.
Dry Out Water-Damaged Walls and Floors
Use high-volume air movement and dehumidification to dry water-damaged walls and floors as quickly as possible.
You should position air movers to push across surfaces, not directly into them, so moisture evaporates evenly. Then run dehumidifiers to pull vapor from the air and prevent reabsorption.
Check wall cavities, baseboards, and subfloors with a moisture meter to verify progress, and keep drying until readings match unaffected areas.
Maintain steady indoor temperatures and open pathways for airflow between rooms.
- Track moisture readings twice daily
- Lift or vent carpet edges if needed
- Space equipment to avoid dead zones
- Monitor humidity for stable conditions
- Keep the area accessible for your team
Remove Unsalvageable Materials Safely
When drying no longer reduces moisture in affected areas, you need to remove materials that can’t be restored safely. You should start with porous items that stayed wet too long, such as swollen drywall, carpet pad, insulation, and particleboard.
Cut back damaged sections beyond the visible stain to reach sound, dry material. Use a utility knife, pry bar, and HEPA vacuum, and work from the cleanest edge toward the damaged zone.
Wear gloves, eye protection, and a respirator if dust or debris is present. Bag removed material immediately and seal it before carrying it out.
Keep exposed framing stable and avoid unnecessary demolition. As you work, label removed sections so your crew stays organized and your repair plan moves forward without confusion or delay.
Sanitize Surfaces After Water Damage
After you remove damaged materials, disinfect all affected hard surfaces with an appropriate antimicrobial cleaner or EPA-registered disinfectant.
You’ll need to scrub away residue, then keep the area dry so you don’t create conditions for mold regrowth.
Verify that surfaces are fully cleaned and dried before you move on to repairs.
Disinfect Affected Surfaces
Disinfect all affected surfaces to reduce the risk of mold, bacteria, and lingering contamination after water intrusion. You’ll clean hard, nonporous areas with an approved disinfectant that matches the material and contamination level.
Work in small sections so you can keep full contact time and avoid missing edges, seams, and hardware. Use PPE, ventilate the space, and replace cloths when they become dirty. If you’re part of a restoration team, follow the same sequence so everyone gets consistent results.
- Remove residue before applying disinfectant.
- Saturate surfaces evenly, then let them dwell.
- Agitate stubborn film with a clean brush.
- Rinse only when the product label requires it.
- Document treated areas for quality control.
Prevent Mold Regrowth
With the surfaces cleaned and disinfected, you can focus on stopping mold before it starts. You need to keep indoor humidity below 60% by running dehumidifiers, HVAC, or exhaust fans.
Inspect walls, trim, subfloors, and hidden cavities for dampness, because mold can return in as little as 24 to 48 hours. Replace porous materials that stayed wet too long, including insulation, carpet pad, and ceiling tile.
Wipe nonporous surfaces with a mold-inhibiting cleaner, then dry them completely. Improve airflow by opening interior doors and spacing furniture away from walls.
Check moisture readings with a meter until they stabilize. When you act quickly and methodically, you protect your home and stay in control with the rest of your crew.
Check for Mold and Hidden Moisture
Check for mold and hidden moisture by inspecting porous materials, wall cavities, baseboards, and subflooring for discoloration, musty odors, and dampness that surface drying may miss.
Use a moisture meter to confirm elevated readings, then trace the source before you call the area dry. Look closely at corners, seams, and behind fixtures where trapped water often lingers.
If you belong to a household managing repairs, this step helps you protect everyone’s health and avoid repeat damage.
- Probe suspected areas with calibrated tools
- Note any staining or swelling
- Check insulation for retained moisture
- Verify relative humidity stays controlled
- Isolate contaminated materials for testing
You’ll catch hidden problems sooner and support a safer, cleaner recovery for your home.
Rebuild Walls, Floors, and Trim
Once the structure is dry and clean, you can begin rebuilding walls, floors, and trim with replacement materials that match the original assembly.
Cut damaged drywall back to solid framing, install new panels, and tape and finish seams to restore strength.
Replace swollen subfloor or flooring sections, then fasten new underlayment and surface materials so they sit flat and secure.
Match trim profiles, set them with finish nails, and caulk joints where needed for a tight fit.
You’ll want to keep fasteners corrosion-resistant in damp-prone areas and verify each repair aligns with adjacent surfaces.
When you rebuild carefully, you protect the home’s structure and help the space feel whole again for everyone who lives there.
Finish Restoration With a Final Inspection
After all repairs are complete, you should perform a final inspection to confirm the home is safe, dry, and fully restored. You verify moisture readings in walls, floors, and trim, then compare them with acceptable thresholds. You inspect for staining, warping, odors, loose seams, and electrical or HVAC issues.
Check all repaired surfaces for fit and finish.
Confirm insulation and hidden cavities are dry.
Test outlets, switches, and fixtures.
Review sanitation in every affected room.
Document results and note any follow-up work.
You then walk through each space with your team, ensuring everything meets standards and feels right for your household.
This last step helps you close the project with confidence and belong in a home that’s truly restored.
Frequently Asked Questions
How Long Does Water Damage Repair Usually Take?
Usually, you’ll need a few days to several weeks, depending on damage severity, drying time, demolition, sanitation, and rebuilding. You’ll move faster when you act quickly and professionals inspect thoroughly.
Will Homeowners Insurance Cover the Repair Costs?
Usually, yes, if the damage came from a sudden covered event. You’ll need to review your policy, document losses, and file promptly. Gradual leaks, neglect, and flood damage often aren’t covered.
Can I Stay in My Home During the Restoration?
You can sometimes stay, but it’s like living beside a construction zone. You’ll need safe access, controlled humidity, and sealed affected rooms. If contamination, structural damage, or power loss exists, you should relocate temporarily.
What Equipment Do Professionals Use for Drying?
You’ll see professionals use air movers, dehumidifiers, moisture meters, and sometimes HEPA air scrubbers. They position this equipment to speed evaporation, control humidity, and verify your materials dry thoroughly, safely, and completely.
How Much Does Professional Water Damage Repair Cost?
Costs can feel like a moving target: you’ll usually pay $1,200–$5,000, but severe damage can exceed $10,000. You’ll see prices based on area size, drying time, sanitation needs, and reconstruction complexity.
Recap
In short, you protect your home fastest when you treat water damage like a chain reaction: stop the leak, dry the structure, remove unsafe materials, and verify every hidden cavity. Rooms dried within 48 hours had far fewer mold issues later. Think of it like shutting off a burst pipe in a lab—precision matters. When you inspect, sanitize, rebuild, and recheck, you don’t just repair damage; you restore safety.