
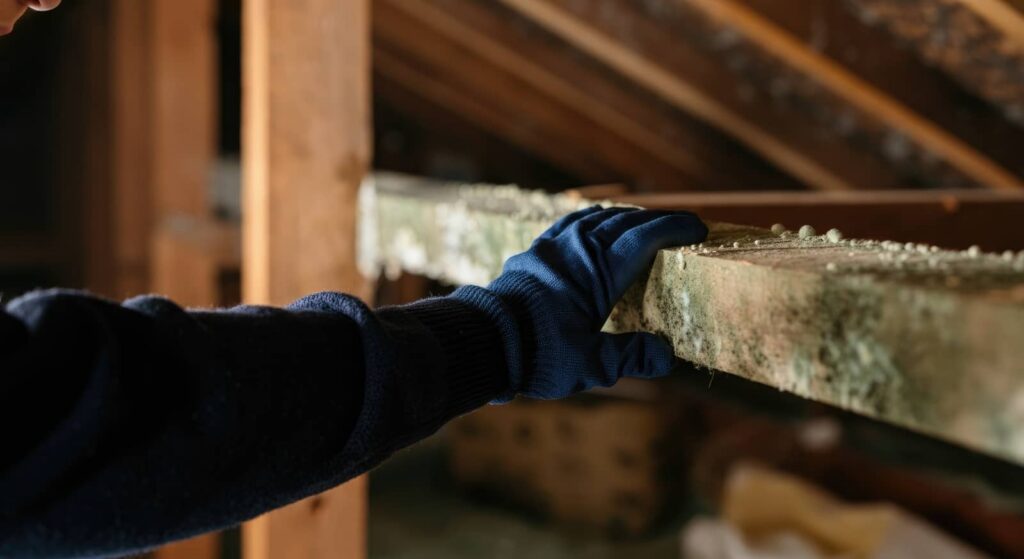
Attic mold cases can start after a roof leak, so you can’t treat a stained ceiling as a minor issue. If moisture lingers in insulation, framing, or decking, mold can spread fast and weaken indoor air quality. You need to stop the leak, dry the space, and remove contaminated materials before damage escalates—but the critical question is how far the hidden growth has already reached.
Key Takeaways
- Stop the roof leak immediately by repairing damaged shingles, flashing, vents, and other roof penetrations.
- Dry the attic fast with fans and dehumidifiers; remove insulation that stays wet after 24 to 48 hours.
- Look for mold signs like musty odors, dark speckling, fuzzy growth, damp insulation, and stained or warped wood.
- Improve attic ventilation by clearing soffit vents, exhausting bath and dryer vents outdoors, and keeping indoor humidity low.
- Hire a mold specialist for persistent growth, hidden contamination, or insurance documentation; remediation may take days to weeks.
Why Roof Leaks Cause Attic Mold?
Roof leaks create the damp conditions attic mold needs to grow. When water enters through damaged shingles, flashing, or roof penetrations, it soaks sheathing, rafters, and insulation.
You then trap moisture in a warm, enclosed space where spores can colonize porous materials fast. Because attics often have limited airflow, evaporation slows, and relative humidity stays elevated long after the leak stops.
That persistent moisture weakens wood, reduces insulation performance, and supports fungal growth across structural surfaces.
Effective attic mold remediation starts with stopping the leak, drying the assembly, and removing contaminated materials before spread occurs.
You’re not dealing with a cosmetic issue; you’re protecting your home’s structure and your household’s shared air quality.
Prompt action keeps your attic safer, drier, and more resilient.
Signs Your Attic Has Mold Damage
What should you look for when attic mold damage starts to spread? You’ll usually see dark speckling on roof sheathing, rafters, or trusses, often near leaks or humid zones.
Watch for fuzzy, green, black, or white growth, plus a persistent musty odor that won’t fade after airing out.
You may notice insulation that’s damp, matted, or discolored, which tells you moisture has already entered the assembly.
Look for staining, warping, or peeling on wood surfaces, because mold often follows water intrusion and material breakdown.
If you belong to a home crew that checks the attic regularly, trust your senses: visible growth, odor, and moisture staining together indicate active damage.
The sooner you identify these signs, the better you can protect your attic system.
Stop the Leak Before Mold Spreads
You need to seal every roof entry point immediately, because ongoing leaks keep feeding attic mold growth.
Inspect flashing, shingles, vents, and penetrations, then repair or replace failed components to stop new moisture intrusion.
After the leak is controlled, dry all affected materials quickly to limit staining, insulation damage, and further contamination.
Fix Roof Entry Points
A single roof opening can let water keep feeding attic mold, so you need to locate and seal every entry point before remediation begins.
Inspect shingles, flashing, valleys, vents, pipes, skylights, and roof penetrations for gaps, corrosion, or failed sealant. You should trace stains uphill to find the true intrusion path, not just the visible damage.
Replace damaged materials, reset loose fasteners, and apply compatible flashing tape or roofing sealant where approved. If decking is split or warped, repair it to restore a tight barrier.
Verify that gutters and downspouts move water away from the roof edge. When you close every leak source, you protect your crew, your home, and the rest of the attic system from continued moisture intrusion.
Dry Affected Materials
Once you’ve sealed the leak source, dry the attic quickly to stop residual moisture from feeding mold growth.
You should move air with fans and a dehumidifier, targeting wet sheathing, rafters, insulation, and drywall.
Remove soaked insulation that can’t dry within 24 to 48 hours, because it traps moisture and supports spores.
Wipe standing water from framing, then verify moisture levels with a meter before you close any cavity.
Keep vents unobstructed so air exchange improves throughout the space.
If you share the attic with ductwork or wiring, protect those systems while drying.
You’re not just protecting materials; you’re protecting the whole home team from staining, odors, and hidden decay.
When surfaces read dry, you can proceed with cleaning and containment.
What Happens During Attic Mold Remediation?
Attic mold remediation starts with a thorough inspection to identify moisture sources, mold growth, and any damage to roof decking, framing, or insulation. You then get a targeted plan that isolates the work area, controls airborne spores, and protects the rest of your home.
Diagnose the leak path and confirm moisture readings.
Set containment and negative pressure equipment.
Clean affected structural surfaces with approved methods.
Verify drying and document the restored condition.
You’ll notice each step focuses on precision, so you can trust your attic’s recovery and feel confident your home’s protective envelope is being restored.
Technicians may also use HEPA filtration to capture residual particles and reduce recontamination risks.
Remove Wet Insulation and Damaged Materials
You should identify any saturated insulation first, since wet materials won’t dry properly and can keep feeding mold growth.
Remove contaminated insulation, drywall, or other affected materials using controlled methods to prevent spreading spores.
Then replace damaged building components so the attic can be fully restored and prepared for drying and cleanup.
Identify Saturated Insulation
When insulation absorbs moisture from a roof leak or condensation, it loses its thermal value and can trap mold against framing and sheathing. You need to identify every saturated section fast so you can protect the attic assembly and stay ahead of hidden damage.
Press insulation lightly; if it feels dense, clumped, or cool, mark it.
Check for darkened fibers, rusted fasteners, and staining on the ceiling plane.
Use a moisture meter on batt, blown-in, and foam areas to confirm elevated readings.
Trace wet zones to their edges, since water often migrates beyond the visible stain.
Document each affected area before you move forward. That record helps you work methodically, coordinate with your team, and keep the remediation scope accurate.
Remove Contaminated Materials
Strip out all wet insulation and any materials that show staining, decay, or mold growth before they can continue feeding the problem.
You need to work methodically, isolating the affected zone so spores don’t spread into cleaner parts of the attic. Bag loose debris as you remove it, and keep the area ventilated while you work.
If insulation is compacted, friable, or waterlogged, don’t try to save it; it’s already compromised. You should also remove porous materials that can’t be fully cleaned and dried.
Wear gloves, eye protection, and a respirator rated for mold exposure. Keep your removal path controlled, and don’t disturb unaffected areas.
When you clear contaminated material thoroughly, you give your attic a real chance to recover with the rest of the team’s effort.
Replace Damaged Building Components
After the contaminated materials are out, replace any components that can’t be restored, starting with saturated insulation and any wood, sheathing, or trim that shows ongoing staining, decay, or mold damage.
You’ll protect the attic system by reinstalling only dry, sound materials and matching the original assembly. Your crew should verify framing moisture content before closure and confirm the leak source is fixed.
- Remove and dispose of wet insulation.
- Replace compromised sheathing or trim.
- Inspect framing for hidden decay.
- Rebuild with code-compliant materials.
When you restore these elements promptly, you help keep the attic in your homeowner community healthier, more durable, and easier to maintain.
Finish by sealing penetrations, preserving ventilation paths, and documenting every replacement so you can track remediation quality.
Fix Ventilation and Moisture Problems
To stop attic mold from returning, you need to correct the moisture source and improve airflow at the same time.
Seal roof penetrations, flashing gaps, and duct leaks so humid air can’t enter the attic space. Check bathroom, kitchen, and dryer vents; route each one outdoors, not into the attic.
If insulation blocks soffit vents, clear the path so intake air can move freely. Then verify that ridge, gable, or roof vents create balanced exhaust.
You should also reduce indoor humidity by running exhaust fans during showers and cooking, and by keeping the house’s relative humidity near 30% to 60%.
This approach protects your attic structure, supports healthy materials, and helps your home stay dry, stable, and mold-resistant.
When Should You Hire an Attic Mold Specialist?
Even with corrected ventilation and moisture control, some attic mold problems need specialized removal. You should hire an attic mold specialist when contamination keeps returning, spreads beyond a small area, or affects insulation, framing, or ductwork.
A qualified pro uses containment, filtration, and verified cleanup methods that protect your home and your household.
- You see widespread growth on rafters or sheathing.
- You smell persistent mustiness after drying efforts.
- You suspect hidden mold behind insulation or in cavities.
- You want documentation for insurance, buyers, or compliance.
When you act early, you join homeowners who handle attic issues with confidence. A specialist can assess risk, define the source, and remove mold without guessing.
That precision helps you protect your space and keep your property resilient.
How Long Does Attic Mold Remediation Take?
How long attic mold remediation takes depends on the size of the affected area, the extent of moisture damage, and whether the mold has spread into insulation, framing, or hidden cavities.
For a small, accessible section, you may finish in one to two days. If you need demolition, drying, HEPA vacuuming, antimicrobial treatment, and replacement of contaminated materials, expect three to seven days.
Larger or concealed growth can extend the job to several weeks, especially when you must confirm the roof leak is fixed and the attic moisture level is stable.
You’ll move faster when you clear access, isolate the work zone, and let the crew verify cleanup with inspection. That way, you and your household can return to a safer attic with confidence.
What Does Attic Mold Remediation Cost?
Attic mold remediation costs vary with the affected area, mold extent, and underlying moisture source, such as a roof leak or ventilation failure.
You’ll usually pay for an inspection first, and that fee may apply toward the total if you authorize the work.
Repair and cleanup costs rise when you need insulation removal, containment, drying, and structural repairs.
Cost Factors
The price of attic mold remediation depends on the extent of contamination, the source of moisture, and the condition of surrounding materials. You’ll usually pay more when mold has spread into framing, sheathing, or insulation, because crews must remove, clean, and replace affected components. Tight attic access also raises labor time.
- Contamination area size
- Material replacement needs
- Moisture-source repair complexity
- Containment and disposal requirements
If you share your attic with a qualified remediation team, you’ll get a clearer scope and fewer surprises.
Hidden damage often drives costs higher than surface staining, so fast action protects both your home and your budget. You’re not just paying to remove mold; you’re restoring a dry, stable attic system that supports your home’s long-term performance.
Inspection Fees
Inspection fees usually cover the initial site visit, moisture evaluation, and mold assessment needed to define the scope of attic remediation.
You’ll typically pay for a licensed inspector to document visible growth, trace moisture pathways, and measure humidity or wood saturation levels. This fee often varies by attic size, access difficulty, and whether thermal imaging or lab sampling’s needed.
In many cases, a straightforward inspection can keep your team aligned on the right next steps and prevent you from overpaying for unnecessary work.
Expect higher costs when the roof leak is hidden, the insulation blocks access, or contamination appears widespread.
A clear inspection report gives you a technical baseline, so you can compare bids confidently and move forward with your remediation plan.
Repair And Cleanup
Once you’ve identified the source and extent of the damage, repair and cleanup costs usually make up the largest share of attic mold remediation. You’ll pay for containment, HEPA vacuuming, antimicrobial treatment, and disposal of contaminated materials.
If leaks damaged decking, rafters, or insulation, you’ll also need structural repairs and replacement. Labor rates rise when access is tight or mold covers more square footage.
- Containment setup: isolates spores and protects your home.
- Mold removal: clears visible growth and contaminated dust.
- Material replacement: restores insulation, sheathing, and vapor barriers.
- Post-cleanup verification: confirms the attic’s safe, dry condition.
When you act quickly, you help your household stay healthier and keep costs more predictable.
Prevent Mold After Future Roof Leaks
If a roof leak happens again, you can limit mold growth by acting fast on moisture control. Stop the intrusion, dry the attic within 24 to 48 hours, and verify that insulation, sheathing, and framing reach safe moisture levels.
You should inspect flashing, shingles, vents, and penetrations after storms so your home stays protected and your crew stays ahead of damage. Improve attic ventilation with balanced intake and exhaust, and seal air leaks from conditioned spaces to cut condensation.
Replace wet insulation promptly, because trapped humidity feeds mold spores. Keep gutters clear and schedule seasonal roof checks.
When you stay consistent, you protect your attic, strengthen your home’s resilience, and join the homeowners who manage leaks before they become costly mold problems.
Frequently Asked Questions
Can Attic Mold Affect My Home’s Indoor Air Quality?
Yes, attic mold can affect your home’s indoor air quality by releasing spores and odors that you can breathe. It may trigger allergies, worsen asthma, and spread contamination through ventilation, insulation, and ceiling gaps.
Is Attic Mold Remediation Covered by Homeowners Insurance?
Usually, you’ll get coverage only if a sudden, covered peril caused the mold; insurers often deny gradual moisture damage. You should review your policy, document losses, and ask an adjuster to verify your claim.
Can I Stay in My House During Attic Mold Removal?
Yes, you can often stay, if the affected attic’s sealed, ventilation’s managed, and containment’s intact. You’ll need to follow your remediator’s access rules, avoid work zones, and leave if dust, odors, or symptoms increase.
How Do I Tell if Roof Leak Damage Is Mold or Mildew?
You can tell by texture, odor, and growth pattern: mold looks fuzzy or slimy, spreads irregularly, and smells musty; mildew stays flat, powdery, and surface-level. If you’re unsure, test it professionally.
Do I Need a Roof Repair Before Mold Cleanup Starts?
Yes—you should repair the roof first, because ongoing water intrusion keeps feeding growth. Then you can remove contaminated materials, dry the attic, and restore clean conditions safely. This keeps you protected and part of a healthier home.
Recap
In short, attic mold remediation after roof leaks works best when you act fast. You stop the leak, dry the space within 24 to 48 hours, remove wet insulation, and clean contaminated surfaces before spores spread. If mold keeps returning or covers larger areas, bring in a specialist. Think of it like a digital firewall for your attic: one breach can cascade. With prompt repairs and proper ventilation, you’ll protect your home, health, and repair budget.