
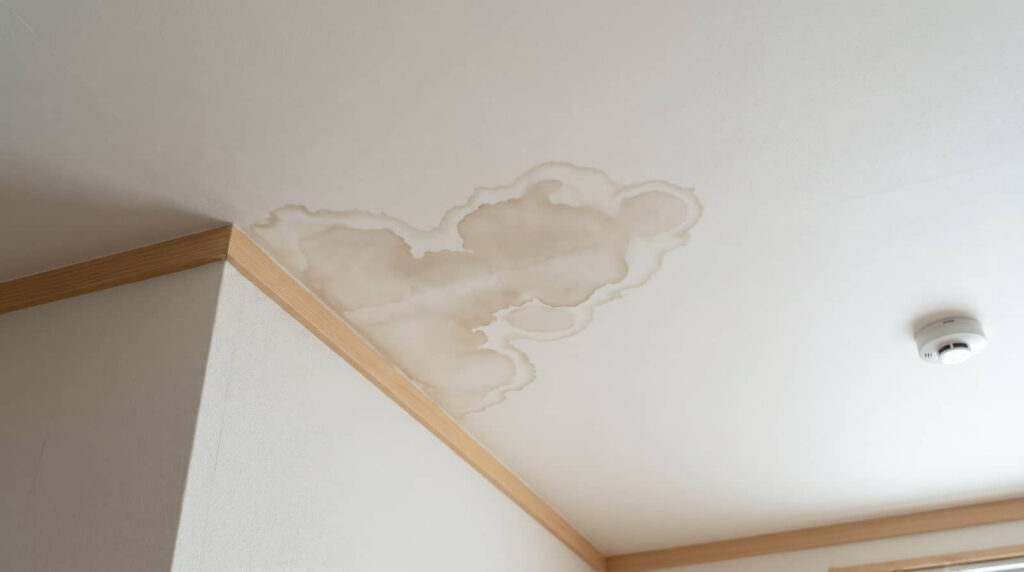
After a ceiling leak, you need to act quickly before moisture spreads into drywall, insulation, and framing. You should stop the source if you can, protect the room, and document every affected area for insurance. Then check for hidden wet spots, because surface drying alone won’t tell you what’s trapped above. The next steps determine whether you’re facing a minor cleanup or a larger repair.
Key Takeaways
- Shut off the water source immediately and move furniture, electronics, and valuables out of the affected area.
- Document damage with clear, date-stamped photos for insurance, including wide shots and close-ups of wet ceiling and walls.
- Dry the area quickly using fans and dehumidifiers, and remove standing water, damp materials, and wet furnishings.
- Inspect drywall and insulation for soft spots, stains, or mold, and remove any saturated or crumbling sections.
- Call a water damage restoration professional if the leak is severe or hidden moisture may remain behind walls or ceilings.
Act Fast After a Ceiling Leak
If you notice a ceiling leak, act quickly to limit water damage and reduce the risk of mold, structural deterioration, and hidden moisture.
You should begin water damage cleanup after ceiling leak conditions as soon as surfaces are safe to access. Remove damp furnishings, then document affected areas so you can track progress and share clear details with your restoration team.
You’ll protect wet drywall and insulation by drying the space promptly with fans and dehumidifiers. Check for stains, soft spots, and lingering moisture in adjoining materials, because damage often extends beyond what you can see.
When you respond fast, you stay in control, reduce repair costs, and help your home recover with confidence.
Stop the Leak and Protect the Room
Shut off the water source immediately to stop additional leakage and limit further ceiling saturation.
Move valuables, electronics, and furnishings out of the affected area as quickly as you can to reduce damage.
Then contain the spread with tarps, buckets, or plastic sheeting so you can protect the room while cleanup begins.
Shut Off Water Source
Before you begin cleanup, locate the source of the ceiling leak and shut off the water supply to stop further damage. If the leak comes from a fixture, close the nearest isolation valve. If you can’t identify the branch line, turn off the main shutoff for the home or unit.
Confirm the water has stopped by checking the drip rate and listening for flow in walls or above the ceiling. If the leak involves hot water, shut off the water heater too.
For shared buildings, notify management so they can coordinate repairs. Keep the area accessible for inspection, and avoid restoring water until the source is repaired and the system is tested.
Acting quickly helps protect your space, limits hidden moisture, and keeps your cleanup team working from a stable starting point.
Move Valuables Quickly
Once the leak is under control, move furniture, electronics, documents, and other valuables out of the affected area to limit damage.
Prioritize items with electrical components, paper records, and upholstered pieces, since they can absorb moisture fast. Unplug devices before handling them, then place each item in a dry room with stable airflow.
Lift rugs and small furniture first, and ask for help with heavy pieces to avoid injury and floor damage. If you share the space with others, coordinate so everyone knows what’s been moved and where it’s going.
Keep pathways clear for inspection and drying access. Quick removal reduces staining, corrosion, and warping, and it helps your team stay organized while restoring the room after the ceiling leak.
Contain The Spread
While you’re waiting for repairs, stop the leak at its source if it’s safe to do so, then limit further spread by moving items out of the wet zone and isolating the affected area.
Shut off power to damp fixtures if needed, and place towels or plastic barriers to protect flooring and nearby walls. You’re not alone in this process; tight, fast action helps your space stay manageable.
- Protect belongings: remove photos, textiles, and electronics.
- Confine moisture: close doors and block airflow to dry rooms.
- Watch for hidden damage: check wet drywall, insulation, and ceiling stains.
If you see sagging material, avoid contact and call a pro.
Containment now reduces cleanup later, supports safer drying, and helps your home feel controlled again.
Take Photos for Your Insurance Claim
Document the damage as soon as it’s safe to do so, and take clear photos for your insurance claim. Use a phone or camera with good resolution, and capture wide shots plus close-ups of each affected area. Photograph the ceiling, walls, floors, furniture, and any water path you can see.
Include date-stamped images if your device supports them, and keep the original files unedited. Make notes that match each photo, such as room name, time, and what you observed.
If you share the space with others, coordinate so everyone preserves the same record. Save copies in cloud storage and on a local drive.
This organized documentation helps your claim move smoothly and shows you’re handling the loss like a prepared team member.
Check for Wet Drywall and Hidden Moisture
You should inspect the drywall for soft spots, swelling, discoloration, and any loss of structural integrity.
Use a moisture meter to detect hidden moisture behind the wall surface, especially near seams, baseboards, and ceiling penetrations.
If readings stay elevated, you’ll need further drying or material removal to prevent mold growth and concealed damage.
Inspect Wet Drywall
Start by inspecting the wet drywall for soft spots, discoloration, and any signs of hidden moisture behind the surface.
You should press gently with a clean hand and note areas that feel spongy, warped, or cold.
Watch for peeling paint, bubbling tape, and sagging seams, since these often show water exposure.
Mark damaged sections so you can keep track of the repair zone and stay organized with the rest of your crew.
- You’ll feel more in control when you identify damage early.
- You can protect your space before the problem spreads.
- You’ll know you’re taking the right first step together.
If the drywall crumbles or bows, treat it as compromised and plan removal.
Keep the area dry, ventilated, and clearly labeled for safe cleanup.
Detect Hidden Moisture
Use a moisture meter and infrared camera to detect hidden moisture in and behind wet drywall, especially around seams, baseboards, and ceiling penetrations. You’ll confirm whether the leak spread beyond visible staining and trapped water inside cavities.
Scan adjacent rooms, attic framing, and insulation so you don’t miss damp materials that can support mold growth. Record readings in each affected zone and compare them with dry reference areas.
If the meter stays elevated after surface drying, open the wall for inspection and expose the cavity. Then you can verify whether insulation, framing, or backing boards need removal.
This method helps you protect your space, coordinate repairs with confidence, and stay aligned with others who value thorough, informed cleanup after a ceiling leak.
Dry the Ceiling Before Damage Spreads
Once a ceiling leak is contained, dry the affected area immediately to limit moisture migration into drywall, insulation, and framing.
You should set up air movers to push dry air across the ceiling surface and use a dehumidifier to pull excess vapor from the room. Open nearby doors and vents if it helps airflow without spreading dust.
Keep the space safe and connected by checking progress together with your team.
- You lower the chance of stains that make the room feel neglected.
- You reduce the risk of hidden dampness that can keep the area out of service.
- You protect your home’s structure and support a faster return to normal.
Monitor humidity and surface temperature until readings stabilize and the ceiling feels dry to the touch.
Replace Soaked Drywall and Insulation
When the ceiling is dry enough to inspect, remove any drywall and insulation that stayed wet or shows staining, sagging, or softening. You’ll need to cut back to sound material so you’re not trapping moisture in the assembly.
Use clean tools, bag the debris, and keep the area organized so your crew can work efficiently. Replace damaged insulation with new product that matches the cavity depth and thermal rating.
Install new drywall, fasten it securely, and tape, mud, and sand the joints for a stable finish. Check that framing is dry and intact before you close the ceiling.
If you work methodically, you’ll restore the space with confidence and reduce the chance of hidden damage returning later.
Remove Mold and Musty Odors
If mold has started to grow after the leak, you’ll need to remove it before you close the ceiling again. Clean affected framing, drywall edges, and fasteners with a mold-safe cleaner, then dry the area completely.
Use a HEPA vacuum on debris so you don’t spread spores through your home. To eliminate musty odors, scrub porous surfaces, run ventilation, and place odor absorbers until the space smells neutral again.
- You protect your home’s air and restore confidence.
- You keep your repair work from feeling unfinished.
- You help everyone in your household feel comfortable again.
Check hidden cavities for lingering moisture, because odor often returns when damp material remains.
When the area is clean and dry, you can move forward with a ceiling that feels secure, healthy, and truly yours.
Call a Pro When Damage Is Severe
If the leak soaked large areas of drywall, insulation, or framing, call a water damage restoration pro right away.
You’re dealing with more than surface staining; hidden moisture can spread behind walls and into structural materials. A trained crew uses thermal imaging, moisture meters, and controlled drying to map the affected zone and verify what’s still wet.
They can remove saturated materials safely, protect adjacent rooms, and document the loss for your records. That support helps you stay on track and avoid guesswork when the damage is extensive.
You don’t need to tackle a severe ceiling leak alone. Bring in experienced help early, and you’ll get a cleaner, safer result with fewer surprises during the cleanup process.
Prevent Another Ceiling Leak
After the cleanup, inspect the roof, plumbing, attic, and HVAC condensate lines to find the source of the leak before it returns.
You can protect your home and your crew by fixing weak points fast and documenting each repair. Seal flashing, replace cracked pipes, and clear clogged drains so moisture can’t build up again.
Check insulation and ventilation to keep the attic dry and reduce hidden condensation. Schedule routine inspections after storms and seasonal shifts, because small failures often become costly damage.
- You’ll feel relief when the ceiling stays dry.
- You’ll trust your space more when you catch issues early.
- You’ll protect everyone’s comfort when you stop repeat leaks.
Frequently Asked Questions
How Long Does Ceiling Leak Cleanup Usually Take?
Usually, you’ll need one to three days for cleanup, but drying, repairs, and hidden-moisture checks can extend it to a week or more. You should inspect, remove wet materials, and monitor progress carefully.
Will a Small Ceiling Stain Always Need Repairs?
No, you won’t always need repairs. You should inspect for hidden moisture, drywall softening, insulation damage, or recurring leaks. If the stain is dry and stable, you can monitor it and repaint after verification.
Can I Stay Home During Ceiling Water Damage Cleanup?
Usually, you can stay home if the crew isolates the area, controls dust, and shuts off unsafe utilities. You’ll hear fans humming and smell damp drywall, but hidden moisture still needs professional monitoring.
How Much Does Professional Ceiling Leak Cleanup Cost?
Professional ceiling leak cleanup usually costs you $500 to $3,000, depending on damage extent, drying needs, mold risk, and repairs. You’ll pay more for hidden moisture, insulation replacement, or structural restoration.
Does Homeowners Insurance Cover Ceiling Leak Damage?
Usually, yes, if you’ve got sudden, accidental damage. You’ll need to check your policy, document the leak, and report it quickly. Gradual wear, poor maintenance, and some roof issues often aren’t covered.
Summary
When you act quickly, you stop a ceiling leak from turning your room into a slow-motion flood. Shut off the source, document the damage, and dry the area until hidden moisture is gone. Replace compromised drywall and insulation before mold can take root. If the damage runs deep, bring in a pro. With prompt cleanup and prevention, you keep the next leak from dripping through your home like a cracked pipe in a storm.