
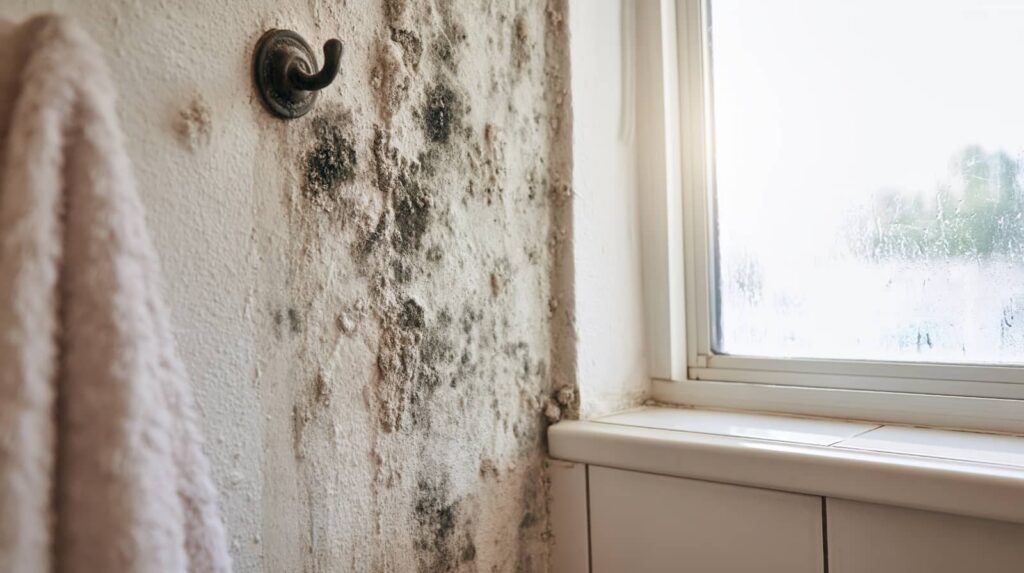
Many bathroom mold problems start with hidden leaks or persistent humidity, so you need to treat both, not just the stain you can see. If grout is cracked, caulk is failing, or the fan can’t clear steam fast enough, mold will keep returning after cleanup. You’ll want to isolate the moisture source first, but the real difference comes from what you do next…
Key Takeaways
- Stop the moisture source first by repairing leaks, failed caulk, grout, or plumbing before cleaning mold.
- Remove and replace porous materials like drywall or subflooring that stay damp or show hidden mold damage.
- Use exhaust fans, improve airflow, and keep bathroom humidity below 60% to prevent mold regrowth.
- Clean affected nonporous surfaces with HEPA vacuuming and targeted wiping after isolating the work area.
- Monitor for recurring stains, odors, or condensation, and document moisture conditions to verify successful remediation.
When Is Bathroom Mold Remediation Needed?
Bathroom mold remediation is needed when mold keeps returning, spreads beyond a small surface area, or points to a moisture problem you can’t resolve quickly.
You should act when leaks saturate grout, drywall, caulk, or subflooring, because surface cleaning won’t stop growth in hidden cavities. If humidity stays high after you run the fan and open the door, your bathroom likely needs corrective work, not another wipe-down.
You can also need bathroom mold remediation after failed repairs, because trapped moisture keeps feeding spores.
Start by identifying the water source, then dry affected materials and remove contaminated porous items.
If you’re addressing the issue early, you’re protecting your space and helping your home stay safe, dry, and comfortable.
Signs You Need Bathroom Mold Remediation
You need bathroom mold remediation when you see visible mold growth on tile, grout, caulk, or drywall, since surface colonies often indicate hidden moisture.
If you notice a persistent musty odor, check for active dampness, poor ventilation, or concealed contamination behind finishes.
Recurring water stains on ceilings or walls also signal an unresolved leak or moisture source that can support mold regrowth.
Visible Mold Growth
Dark patches on grout, caulk, tile, or drywall usually signal active mold growth and mean bathroom mold remediation is needed. You should inspect these areas closely for fuzzy, slimy, or powdery spots that keep returning after cleaning.
Check corners, under sinks, around tubs, behind toilets, and along shower seams where moisture lingers. If the growth spreads beyond a small surface stain, treat it as a contamination problem, not a cosmetic one.
You can document the affected area with photos, then isolate the room if spores may disperse during cleaning. Wear gloves and eye protection, and avoid dry scrubbing that can spread particles.
When mold covers porous materials or keeps reappearing, your bathroom likely needs source control, removal, drying, and repair to restore a healthy space.
Persistent Musty Odors
A persistent musty odor often signals hidden mold growth behind walls, under flooring, or inside damp cabinets, even when you can’t see obvious stains. You should treat that smell as a diagnostic cue, not a nuisance.
First, check ventilation, trap seals, and any area that stays warm and humid after showers. Then inspect caulk joints, vanity interiors, baseboards, and the back of toilet or tub access panels for dampness.
If the odor returns after cleaning, drying, and running exhaust fans, you likely have active moisture supporting mold colonies. In that case, schedule bathroom mold remediation promptly so you can protect indoor air quality and keep your space safe, clean, and comfortable for everyone who uses it.
Recurring Water Stains
When water stains keep reappearing after you clean and dry the area, they usually point to an ongoing moisture source rather than a one-time spill.
You should inspect grout, caulk, supply lines, and the shower pan for leaks, then check adjacent drywall, baseboards, and the subfloor for hidden saturation.
If the stain edges look yellow-brown, expand after use, or feel damp to the touch, moisture is still entering the assembly.
You’ll protect your home by documenting each recurrence, fixing the source first, and replacing any porous material that’s already compromised.
If staining returns within days, mold may be growing behind the finish surface.
In that case, you belong with a remediation plan that includes containment, removal, drying, and verification before you repaint or reseal the area.
How Shower Leaks Cause Mold
When shower grout or caulk fails, water can bypass the visible surface and enter hidden gaps around the enclosure.
That moisture can spread into wall cavities, where it stays trapped and creates ideal conditions for mold growth.
You should inspect these concealed areas promptly, because recurring leaks often keep materials damp long after the shower looks dry.
Hidden Water Intrusion
Even a small shower leak can drive hidden water into wall cavities, subfloors, and framing, where it lingers long after the surface dries. You may not see the damage, but you can often detect it by a musty odor, soft surfaces, staining, or persistent humidity near the shower.
Moisture trapped behind finishes creates an ideal mold environment because the material stays damp, warm, and poorly ventilated. You should inspect adjacent rooms, baseboards, and the ceiling below the shower for clues.
Use a moisture meter to confirm elevated readings and map the wet area. When you find hidden intrusion, stop the source, dry the assembly quickly, and remove contaminated materials if they won’t dry fully.
Acting early helps you protect your home and stay confident in your space.
Grout And Caulk Failures
Grout cracks and caulk gaps are common entry points for shower leaks that can feed bathroom mold. You should inspect joints where tile meets tile, tub, and shower pan, because failed sealant lets water escape during every use.
Look for hairline fractures, missing grout, peeling caulk, and darkened edges. If you spot softness, discoloration, or persistent dampness after showering, you’ve got an active moisture pathway.
Remove loose material, clean the joint, and replace it with mildew-resistant caulk or repair grout as specified. You’ll want a continuous, flexible seal that moves with the fixture.
Staying ahead of these failures helps your bathroom team avoid recurring mold, lingering odors, and repeated cleanup. When you fix the seal promptly, you reduce leak-driven moisture and keep the space healthier for everyone.
Damp Wall Cavities
If a shower leak gets past the tile assembly, it can soak the wall cavity behind the finish surface and create ideal conditions for mold growth. You may not see the damage right away, but you’ll often notice musty odors, loose tile, stained drywall, or recurring spotting near the shower.
Check the cavity by removing trim, an access panel, or a damaged tile area, then look for wet insulation, dark framing, or soft sheathing. You need to stop the leak, dry the cavity quickly, and remove porous materials that stayed wet too long.
Run exhaust ventilation and monitor moisture with a meter. If you find hidden mold, you’re not alone; many bathrooms need professional remediation when leaks keep returning or drying doesn’t restore safe conditions.
Why Bathroom Humidity Keeps Mold Coming Back
Bathroom humidity keeps mold coming back because moisture lingers on walls, ceilings, grout, and hidden surfaces long after showers end.
You create repeated condensation when warm, wet air meets cooler materials, and mold spores use that film to germinate.
Porous finishes absorb vapor, then release it slowly, so the surface stays damp beyond what you can see.
Poor air exchange traps humidity in the room, raising the dew point and extending drying time.
If you wipe visible water but leave the air saturated, you’re giving mold a steady recovery cycle.
To break that cycle, you need consistent drying conditions, not occasional cleanup.
When you understand the moisture pattern, you can restore a healthier space and keep your bathroom feeling clean, dry, and shared with confidence.
Stop Leaks and Moisture First
Before you treat mold, stop the moisture source that feeds it. You need to find every active leak and reduce humidity fast, because mold returns when surfaces stay wet.
Inspect shower caulk, grout, supply lines, toilet seals, and the tub overflow for drips or staining. Then check the fan, window, and door gaps so steam can leave the room.
- Tighten loose fittings and replace failed washers.
- Recaulk cracked joints and reseal gaps around fixtures.
- Run the exhaust fan during showers and 20 minutes after.
- Wipe wet surfaces and fix condensation on cold walls.
If you keep the bathroom dry, you protect your home and join the group of owners who stop mold before it spreads.
What Bathroom Mold Remediation Pros Do
Remediation pros inspect the bathroom, confirm the mold source, and define the full scope of contamination before they start work.
You’ll usually see them isolate the work area with plastic containment, then run negative air to keep spores from spreading. They remove damaged drywall, trim, caulk, or insulation only where contamination warrants it, and they bag debris before disposal.
Next, they clean remaining surfaces with approved methods, including HEPA vacuuming and targeted wiping, so you’re left with a controlled, measurable result.
They also verify hidden cavities, subfloors, and wall voids for residual growth. Throughout the job, they document moisture conditions and removal steps, giving you clear records and a team approach that helps your bathroom feel safe, sanitary, and restored.
Prevent Bathroom Mold After Repairs
Once repairs are complete, your focus shifts to stopping mold from coming back by controlling moisture and airflow. You can protect your bathroom and keep your space healthy with consistent habits and checks.
Run the exhaust fan during showers and for 20 minutes after.
Wipe tile, grout, glass, and caulk dry after each use.
Keep relative humidity below 60% with a hygrometer and dehumidifier.
Inspect sealed joints, under-sink plumbing, and tub edges weekly.
Use mildew-resistant paint on repaired walls, and replace any damaged insulation or drywall promptly.
If you notice staining, odor, or condensation again, act fast. Your diligence helps your household stay comfortable, clean, and confident that mold won’t regain a foothold.
Frequently Asked Questions
How Long Does Bathroom Mold Remediation Usually Take?
You’ll usually need 1-3 days for small bathroom mold jobs, but larger leaks or hidden damage can take a week or more. You should inspect, dry, remove, clean, and verify before reoccupying.
Can I Stay in My Home During Bathroom Mold Removal?
Usually, yes—you can stay home during mold removal if you isolate the work area. Some homes show dampness or mold; you’ll need containment, ventilation, and strict cleanup protocols, though severe contamination may require leaving.
What Does Bathroom Mold Remediation Typically Cost?
You’ll typically pay $500 to $6,000, depending on affected square footage, containment, demolition, and drying. You can lower costs by fixing leaks early, improving ventilation, and documenting damage for insurance claims.
Do I Need to Replace Drywall After Mold Cleanup?
Yes, you often do; if drywall’s soft, stained, or crumbling, replace it. If it’s dry, intact, and fully cleaned, you may keep it. Inspect, test, and seal repairs so you belong to a healthy, safe space.
How Soon Should I Test for Mold After Repairs?
You should test within 24 to 48 hours after repairs dry, then again in 1 to 2 weeks. You’ll verify moisture is gone, detect hidden growth early, and confirm your remediation worked.
Wrap-Up
Bathroom mold remediation works best when you fix the water source first. If you stop shower leaks, seal failed grout and caulk, and control humidity with proper ventilation, mold loses the damp environment it needs to grow. Then, remove contaminated materials and clean affected surfaces thoroughly. Think of moisture control like turning off a switch: once you do it, you make recurrence far less likely and protect your bathroom’s air quality.