
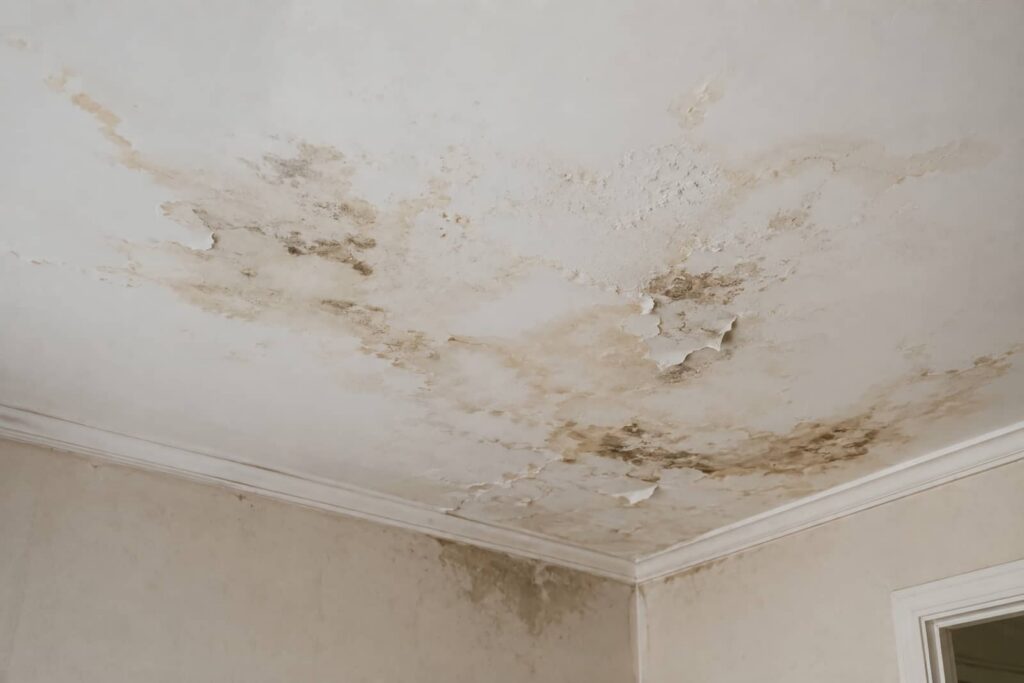
If you spot ceiling stains, sagging drywall, or peeling paint after a leak or storm, you need to act fast. Ceiling Water Damage Repair should start by finding the source, whether it’s roofing, plumbing, or trapped moisture above the ceiling. The right repair depends on what’s hidden behind the surface, and a small delay can turn a manageable fix into a larger structural problem.
Key Takeaways
- Identify ceiling damage by stains, sagging drywall, peeling paint, soft spots, or damp odors.
- Stop the leak source first by checking roofs, flashing, gutters, plumbing, and nearby rooms.
- Make the area safe by turning off electricity near wet spots and limiting use of the room.
- Remove damaged drywall and wet insulation, then dry the ceiling completely before repairs.
- Finish with stain-blocking primer, joint compound, paint, and preventive maintenance for future leaks.
How to Spot Ceiling Water Damage
Ceiling damage often starts with subtle clues, so you need to look closely for discoloration, peeling paint, bubbling texture, sagging drywall, or soft spots that give when you press lightly.
You may also notice faint rings, yellow-brown stains, or a damp odor near fixtures and exterior walls.
Check seams, corners, and areas below bathrooms, attics, and roof penetrations, where moisture often collects.
Use a flashlight to inspect texture changes and compare affected areas with dry sections nearby.
If you see these signs, document them with photos and note when they appeared. That record helps you coordinate ceiling water damage repair with confidence.
When Ceiling Water Damage Repair Is Urgent
Once you’ve spotted stains, sagging, or soft spots, act quickly if the damage is spreading, the ceiling is visibly bowing, or water is actively dripping. Those signs point to active intrusion, structural stress, and a rising risk of collapse, so you shouldn’t wait for the area to dry on its own.
If the material feels spongy, cracks widen, or paint blisters rapidly, treat it as urgent. You’ll protect your home and your people by limiting use of the room, keeping clear of the affected area, and arranging repair right away.
Fast action also helps you stay in control and makes the next steps easier for everyone under your roof. When you respond early, you’re not overreacting; you’re preventing a small failure from becoming a larger, costlier repair.
Find the Leak Before You Patch
Before you patch anything, trace the water back to its source so you’re fixing the problem, not just the stain.
Start with the ceiling area and inspect nearby rooms, attic spaces, or upper floors for damp insulation, dripping pipes, loose supply lines, or wet framing. Use a flashlight and, if needed, a moisture meter to map the spread.
Check for fresh discoloration after rain or after fixtures run, because timing helps you narrow the source. If you see an active drip, place a container under it and document it.
Don’t seal the ceiling until the leak stops and the materials dry. That careful sequence protects your home and helps your crew work with confidence, knowing you’ve already done the first critical step.
Fix Roof Leaks Above the Ceiling
If the damage traces to the roof, you’ll need to repair that leak first or the ceiling will keep failing.
Start above the ceiling and inspect shingles, flashing, vents, skylights, and roof penetrations for cracks, gaps, or missing sealant. Replace damaged materials, then reseal joints with compatible roofing cement or approved flashing tape.
If you find lifted shingles, reset them and fasten them properly. Check the attic for wet insulation and dark staining, because hidden moisture can keep feeding the ceiling stain.
After the exterior repair, test the area with a controlled water run or wait for the next rain. When the source is sealed, dry the framing thoroughly, so your repair crew can restore the ceiling with confidence and keep your home’s envelope strong.
Repair Plumbing Leaks in the Ceiling
You need to locate the hidden leak source first, since ceiling plumbing failures often trace back to pipes, fittings, or joints above the damaged area.
Once you find it, stop the active water flow at the shutoff valve and relieve any remaining pressure in the line.
After the leak’s controlled, dry the ceiling fully and patch the damaged section to restore structural integrity.
Locate Hidden Leak Source
When ceiling water damage points to a plumbing leak, trace the source quickly so you can stop ongoing moisture and limit structural damage.
Start by mapping the stain’s highest, freshest edge, since water often travels along joists, pipes, and framing before it shows below. Inspect bathrooms, attics, and upper floors for damp pipe insulation, corrosion, loose fittings, and active condensation.
Use a flashlight, moisture meter, and inspection mirror to check hidden runs behind cabinets and near vent stacks. If the ceiling texture sags or darkens, probe carefully for soft drywall.
You’re not alone in this process; methodical checks usually reveal the path. Mark suspect areas, document findings, and keep the space ventilated.
Accurate tracing helps you target repairs and restore your ceiling with confidence.
Stop Active Water Flow
Shut off the affected water supply immediately to stop the leak from feeding the ceiling damage.
Then open nearby faucets to relieve pressure in the line and reduce residual dripping. If the source is a fixture above the ceiling, isolate that branch valve too.
You should shut off electricity to any wet ceiling area if lights, fans, or wiring may be exposed.
Place a bucket or pan under accessible drips to protect the room while you work.
If you can safely reach the pipe, tighten a loose fitting or wrap a temporary repair clamp over a pinhole leak.
Keep everyone in your household informed so they can avoid the area and support the response.
Once the flow stops, you’re ready for the next repair step with confidence.
Dry And Patch Ceiling
After the leak stops, dry the ceiling thoroughly before any patching begins, because trapped moisture can worsen staining, weaken drywall, and invite mold.
You should run fans, open windows if weather allows, and use a dehumidifier until the area feels fully dry.
Check insulation and nearby framing for dampness, and remove any soft or crumbly material.
Once the surface is stable, trim loose drywall edges with a utility knife.
Apply a stain-blocking primer, then fill damaged areas with joint compound in thin coats, feathering each pass so the repair blends cleanly.
Sand lightly between coats, wipe away dust, and repaint with a matching finish.
When you work carefully, you help your home recover safely and keep your ceiling looking like it belongs again.
Dry Wet Insulation and Ceiling Cavities
If insulation in the ceiling cavity gets wet, you need to dry it quickly or replace it, because saturated insulation loses its thermal value and can keep hidden moisture trapped against framing and drywall.
Open the cavity carefully, then check the insulation type and extent of saturation. You can use fans, dehumidifiers, and steady airflow to drive out moisture, but you shouldn’t seal the area until readings confirm safe dryness.
If batts stay matted, discolored, or smell musty, remove them and install new material. You also need to inspect joists, fasteners, and nearby wiring for lingering dampness.
When you handle the cavity methodically, you protect your home and stay in control with the rest of your repair team.
Repair Stains, Bubbling, and Peeling Paint
Once the source of the leak is fixed and the area is fully dry, you can repair ceiling stains, bubbling, and peeling paint by removing any loose material, then cleaning and priming the surface with a stain-blocking primer. You’ll restore a uniform finish and prevent old discoloration from bleeding through.
Scrape away lifted paint with a putty knife.
Feather the edges lightly with fine-grit sandpaper.
Wipe dust away with a damp microfiber cloth.
Apply primer only to the affected area.
Recoat with matching ceiling paint after drying.
If staining remains, add a second primer coat before repainting. Work in good light so you can spot missed edges.
When you follow these steps, you’re part of the homeowners who handle moisture damage with confidence, care, and clean results.
Replace Sagging or Cracked Ceiling Drywall
When ceiling drywall sags, bows, or shows wide cracks, it’s usually too damaged to patch and needs replacement. You should mark the full affected area, then cut back to solid framing and remove every softened section.
If the insulation behind it’s wet or degraded, replace that too so the new panel stays stable. Measure carefully, install matching drywall, and fasten it to joists with proper spacing.
Tape the seams, apply joint compound in thin coats, and sand between passes for a flat finish. If the texture matches the rest of your room, blend it now.
You’re not overreacting; you’re restoring the ceiling’s strength, appearance, and safety with a repair your home can count on.
Stop Ceiling Leaks After a Storm
After a storm, a ceiling leak usually means water is still entering from above, so fixing the visible damage alone won’t solve the problem. You need to trace the source fast and protect your home’s structure.
Start by checking the roof, flashing, vents, and gutters. Then shut off electricity to wet areas and place containers under drips.
- Inspect shingles for blow-offs
- Seal damaged flashing joints
- Clear clogged gutters and downspouts
- Check attic insulation for saturation
- Call a roofer if leaks persist
If you’re unsure, don’t wait; hidden moisture can spread. You’re not handling this alone—your repair team can help you stop the leak, dry the ceiling cavity, and prevent mold before it starts.
Frequently Asked Questions
How Much Does Ceiling Water Damage Repair Typically Cost?
You’ll usually pay $300 to $1,500 for ceiling water damage repair, depending on damage size, materials, and drying needs. If mold or structural issues exist, costs can rise, so you should get a prompt inspection.
Will Insurance Cover Ceiling Water Damage Repairs?
Yes, your insurance may cover it if a sudden, covered event caused the damage. You’ll likely need prompt documentation, mitigation, and claim filing. Gradual leaks, neglect, and poor maintenance usually aren’t covered.
Can I Stay Home During Ceiling Water Damage Repairs?
Yes—you can often stay home, but wait: if crews cut drywall, run fans, or find mold, you’ll need to relocate temporarily. You’ll stay safer and feel included when you follow the contractor’s containment plan.
How Long Does Ceiling Water Damage Repair Take?
You’ll usually need a few hours to several days, depending on drying, damage extent, and material replacement. You can expect faster repairs for small stains, but hidden moisture often extends timelines and needs careful inspection.
Do I Need Mold Testing After a Ceiling Leak?
Yes, you should get mold testing if the leak lasted more than 24-48 hours, you smell musty odors, or see staining. You’ll protect your home, confirm hidden growth, and choose the right cleanup.
Conclusion
When you spot a ceiling stain just as a storm passes or a pipe starts to drip, that coincidence is a warning, not a surprise. You can stop ceiling water damage from spreading by finding the leak, drying the cavity, and repairing the damaged surface with care. If you act quickly, you’ll protect the structure, prevent mold, and restore a clean finish. With the right checks and repairs, your ceiling can stay sound and dry.