
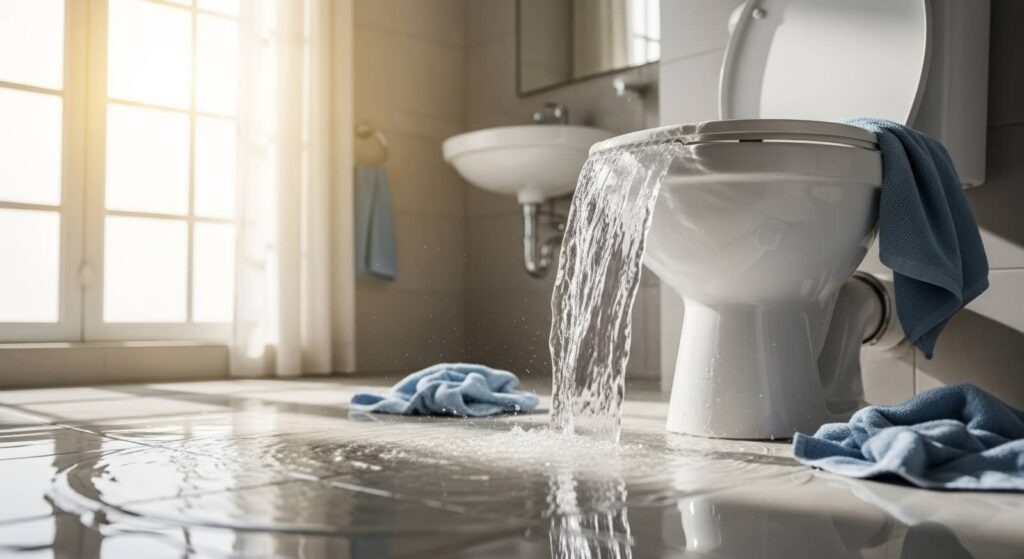
When sewage backs up, the clock starts ticking. You should stop the source if you can, keep everyone away from the area, and avoid using affected plumbing until it’s safe. Then you’ll need to protect yourself, remove standing water, and clean the contaminated surfaces without spreading it further. What stays, what goes, and what hidden damage can follow next may not be obvious.
Key Takeaways
- Stop the backup safely by closing the water supply and avoiding use of toilets, sinks, and appliances.
- Wear waterproof gloves, boots, eye protection, and protective clothing before entering the contaminated area.
- Remove standing water and contaminated materials quickly, then dry the area with fans and dehumidifiers.
- Clean hard surfaces with hot water and detergent, then disinfect with an EPA-registered product.
- Call a sewage cleanup professional, photograph the damage, and separate salvageable items from contaminated ones.
Stop the Sewage Backup Safely
If it’s safe to do so, stop the sewage backup at the source right away. You’re taking the first critical step in what to do after sewage backup.
Close the main water supply if a broken line feeds the overflow, or shut off the nearest fixture valve if one drain is affected. If you can reach the sewer cleanout, secure the cap to limit further discharge.
Don’t run toilets, sinks, dishwashers, or laundry until the line clears. If the blockage sits in a shared or buried line, call your utility or a licensed plumber and report the backup fast.
Keep traffic away from the area so the flow doesn’t spread. Act quickly, stay methodical, and keep your team aligned.
Protect Yourself From Contamination
Put on waterproof gloves, boots, and eye protection before you re-enter the area, and change into protective clothing that you can remove without touching contaminated surfaces.
Keep your skin covered with long sleeves and pants, and seal cuffs if you can. Avoid bringing children, pets, or unprotected helpers into the space.
If you need to move through the area, step carefully and don’t kneel, sit, or lean on wet materials.
Wash your hands and forearms with soap and warm water after each task, even if you wore gloves. Discard or bag anything single-use that may have touched sewage.
If you feel unsure, pause and call a qualified cleanup team; staying cautious protects you and keeps your household aligned on the same safe plan.
Remove Standing Water and Waste
After you’ve protected yourself from contamination, pump out any standing water as soon as possible to limit further damage.
Remove and dispose of contaminated debris, porous materials, and waste that can’t be effectively cleaned.
Then dry all affected surfaces quickly with ventilation and dehumidification to reduce mold growth and structural deterioration.
Pump Out Standing Water
Start by pumping out any standing water and removing visible waste as soon as it’s safe to do so. Use a submersible pump, wet vacuum, or extraction service sized for the volume in your space. Work from the lowest point and keep the hose discharge away from your foundation.
Wear rubber boots, gloves, and eye protection, and avoid direct contact with contaminated water. Pump slowly so you don’t stir up sludge or overload drains.
Check hidden pockets under flooring, in sump areas, and behind baseboards, because trapped water can keep damage spreading. Ventilate the area while you work to reduce moisture buildup.
If the water level keeps rising, stop and call a licensed restoration pro. Acting quickly helps protect your property and keeps your cleanup crew on the same page.
Dispose Of Contaminated Debris
Once the standing water is out, remove all contaminated debris right away so it doesn’t keep spreading sewage residue and moisture.
You’ll need to bag and seal porous items that soaked up waste, like carpet, insulation, drywall, paper goods, and fabric. Use heavy-duty contractor bags, and don’t overfill them.
Move debris through a clean route if you can, and keep it separated from usable belongings.
Wear gloves, boots, and eye protection, and change them if they get soiled. If you find sharp materials, broken glass, or electrical hazards, stop and get help.
Load waste into a covered container or follow local disposal rules for biohazard materials.
Work methodically so your team stays organized, reduces cross-contamination, and keeps the cleanup site safer for everyone involved.
Dry Affected Surfaces Quickly
As soon as the contaminated debris is out, dry affected surfaces fast by removing any remaining standing water and waste with pumps, wet vacuums, mops, or absorbent materials. You need to act quickly because moisture drives odor, corrosion, and microbial growth.
Work from the cleanest area toward the most contaminated so you don’t spread residue.
- Use a pump for deep water.
- Vacuum shallow pools and sludge.
- Mop hard floors with fresh solution.
- Blot carpet, baseboards, and seams.
Open windows if weather allows, and run fans and dehumidifiers to lower humidity.
Check hidden spaces under cabinets, behind trim, and inside wall cavities. If water keeps returning, stop and call a restoration team. Staying thorough here helps protect your property and keeps your crew aligned during cleanup.
What Not to Touch After Sewage Backup
After a sewage backup, don’t touch standing water, wet flooring, soaked drywall, insulation, carpet padding, or any item that has absorbed contamination.
You also shouldn’t handle loose debris, exposed vents, damaged baseboards, or belongings with visible residue.
Keep children and pets away from the area, and don’t move materials unless you can do it without spreading contamination.
Avoid direct contact with bare hands, shoes, or tools that later enter clean rooms.
If you’re part of a household or team handling the property, use a shared rule: treat anything porous, broken, or saturated as off-limits.
That mindset protects everyone and keeps cleanup organized.
When in doubt, leave the material untouched and wait for proper evaluation before you step in further.
Clean and Disinfect Sewage-Affected Areas
Start by washing hard surfaces with hot water and detergent to remove visible sewage and residue.
Then disinfect the area with an EPA-registered product, following the label’s contact time so the treatment works properly.
After cleanup, dry the space completely and use ventilation or deodorizing agents to limit moisture, odor, and mold growth.
Surface Cleaning Steps
Once the area is safe to enter, scrub all hard surfaces with hot water and detergent to remove visible contamination, then disinfect them with a bleach solution or another EPA-registered disinfectant labeled for sewage cleanup.
Wear gloves, boots, and eye protection so you can work confidently and safely with your crew.
- Remove loose debris first; bag it, seal it, and get it out of the space.
- Wash walls, floors, counters, and fixtures from the cleanest point toward the dirtiest.
- Rinse away residue, then wipe surfaces dry with clean towels or disposable cloths.
- Check seams, corners, and joints where grime hides, and repeat cleaning until they look clear.
Keep children and pets away until surfaces are fully cleaned and dry, and you’ve verified that no visible residue remains.
Disinfection Methods
Disinfect all sewage-affected hard surfaces after cleaning, because washing alone won’t eliminate pathogens. Use an EPA-registered disinfectant labeled for sewage or biohazard cleanup, and follow the contact time exactly.
Apply it to floors, walls, cabinets, trim, and other nonporous materials you can safely salvage. Wear gloves, eye protection, and a respirator if aerosols may form.
Mix bleach only when the label allows it, and never combine it with ammonia or other cleaners. Use separate disposable cloths or mop heads for contaminated zones, then discard them after use.
If surfaces remain visibly contaminated, repeat cleaning and disinfection. Keep people and pets out of the area until you’ve finished the full treatment.
When you work methodically, you protect your property and your household together.
Drying And Deodorizing
After cleaning and disinfection, dry the affected area completely to limit mold growth and lingering odors.
Use fans, dehumidifiers, and open windows if weather lets you. Remove wet carpets, pads, and porous materials that trap moisture and smell.
Inspect hidden spaces, such as wall cavities and subfloors, because trapped dampness can keep contamination active.
- Place air movers to push moisture toward exits.
- Run a dehumidifier until humidity drops below 60%.
- Replace saturated insulation and drywall.
- Use odor absorbers or sealants only after full drying.
You’re not handling this alone—your crew can verify dryness with moisture meters and help restore a safe, comfortable space.
If odors persist, call a restoration professional before rebuilding.
Dry Out Walls, Floors, and Fixtures
Use fans, dehumidifiers, and open windows to speed up drying in affected areas. Aim airflow at wet walls, floors, baseboards, and fixtures so moisture leaves fast and mold can’t get a foothold.
You should remove standing water first, then keep the space warm and ventilated if weather allows. Check hidden pockets behind cabinets, under sinks, and around trim, because damp materials can stay wet longer than you expect.
Wipe hard surfaces with clean cloths so they dry evenly. Keep children and pets out of the area while equipment runs.
Monitor humidity daily and keep drying until surfaces feel dry and no musty odor remains. If moisture keeps returning, shut the area down and call a restoration pro before damage spreads.
Decide What You Can Salvage
Sort your belongings into keep, clean, and toss piles, starting with nonporous items like metal, glass, and some hard plastics. You can usually salvage items that don’t absorb sewage and that you can disinfect fully. Keep your decisions strict so you protect your home and your peace of mind.
Save sealed containers, cookware, and washable tools.
Keep solid furniture only if water didn’t soak into the padding or joints.
Toss porous items like carpets, mattresses, insulation, and paper goods.
Discard any item that touched sewage and can’t be cleaned to a sanitary condition.
Label each pile clearly, then move salvageable items to a clean, dry area. When you’re unsure, choose safety over sentiment. Your community gets stronger when you make careful, practical calls.
Check for Hidden Damage and Mold
Once you’ve separated what you can keep, inspect the structure around the backup for hidden moisture, staining, swelling, and soft spots.
Check baseboards, drywall, subfloors, insulation, and cabinet backs, because sewage can wick into closed cavities and keep feeding damage. Use a flashlight and a moisture meter if you’ve got one.
Watch for dark rings, bubbling paint, warped trim, and a musty odor, which often signal mold growth. Feel for cool, damp surfaces and press lightly on materials that look unchanged.
If flooring feels springy or walls sound hollow, moisture may be trapped inside. Mark affected areas so you can track spread and avoid missing spots.
Your goal is to catch early deterioration before it becomes a larger repair problem for everyone.
Call a Sewage Cleanup Professional
If the backup involves sewage, you should call a sewage cleanup professional as soon as possible. You need trained help because contaminated water can carry pathogens, damage porous materials, and spread odors fast.
A licensed team will inspect the affected area, contain the spill, remove waste, and disinfect surfaces to standard.
- Stop using the affected plumbing.
- Keep people and pets out.
- Photograph damage for your claim.
- Ask for drying, sanitation, and disposal details.
When you bring in a qualified crew, you protect your property and your household. You also join a safer path forward, with clear steps and fewer surprises.
Choose a company that offers emergency response, proper PPE, and verified cleanup protocols.
Frequently Asked Questions
How Do I Report Sewage Backup to My Insurance Company?
Call your insurer’s claims line, report the backup, and provide your policy number, date, cause, damages, and photos. You’ll want to document cleanup costs, keep receipts, and ask for your adjuster’s next steps.
Can I Stay in My Home After a Sewage Backup?
No, you shouldn’t stay if sewage’s present. You’ll smell it before you see it, and that coincidence signals danger. Leave, isolate the area, ventilate, and call professionals to assess contamination, drying, and sanitation.
How Long Does Sewage Smell Last After Cleanup?
It usually fades within days after thorough cleanup, but trapped moisture can keep it lingering for weeks. You’ll need drying, disinfection, and ventilation; if odor persists, you should call a restoration professional promptly.
Will My Homeowners Insurance Cover Sewage Damage?
Maybe—you’ll usually get coverage if a sudden plumbing failure caused the sewage damage, but not for gradual backups or neglect. You should review your policy, document losses, and call your insurer and a cleanup pro quickly.
When Should I Replace My HVAC System After Sewage Exposure?
Replace your HVAC system immediately if sewage touched ducts, coils, or insulation. Contamination lingers like a hidden pathogen; you’ll need a pro inspection, sanitization, and often full replacement to protect your home and the people inside.
Wrap-Up
Now that you’ve handled the immediate mess, keep the area off-limits, finish disinfecting, and dry everything fast to prevent mold. Don’t rush to reuse fixtures or save porous items that soaked up sewage. If walls, flooring, or insulation stayed wet, inspect them for hidden damage. When the cleanup feels like a Hail Mary, call a sewage remediation pro. Then document everything for your insurer so you can recover costs and move forward safely.