
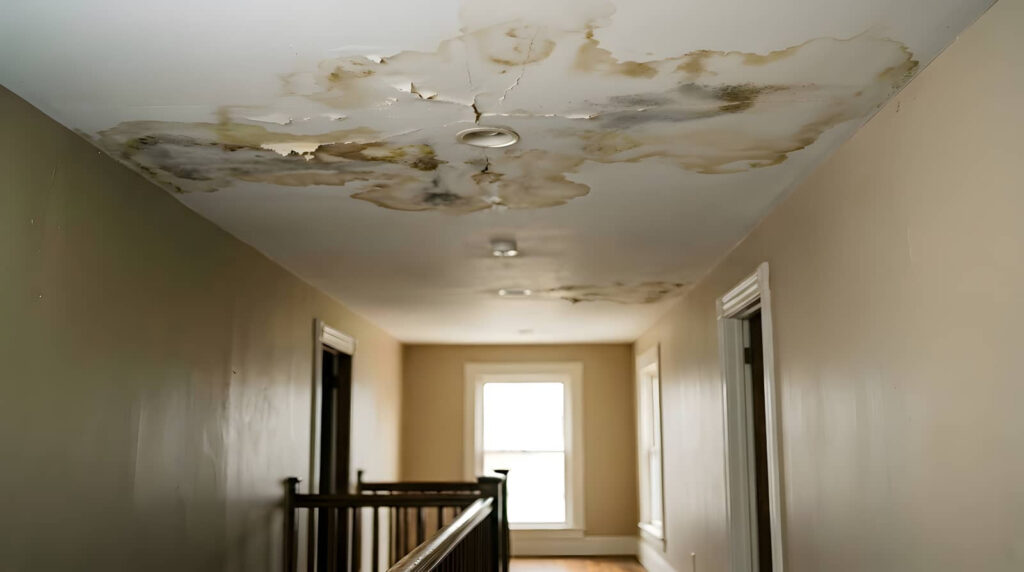
When you spot stains, sagging drywall, or bubbling paint, you need to treat the ceiling as more than a cosmetic problem. Before you patch anything, you have to find and stop the leak, then dry the area completely so hidden moisture doesn’t keep spreading. From there, the repair depends on how far the damage has traveled, and that’s where many ceiling fixes fail.
Key Takeaways
- Identify and stop the leak before repairing any ceiling damage.
- Trace stains to the highest wet point to find the moisture source.
- Dry the ceiling completely with fans, airflow, and moisture removal.
- Scrape loose material, cut out softened drywall, and apply stain-blocking primer.
- Replace the ceiling if sagging, soft spots, mold, or structural damage are present.
Signs of Water Damage on a Ceiling
Water damage on a ceiling often shows up as stains, sagging, bubbling paint, or peeling drywall, and you should treat these as early warning signs rather than cosmetic issues.
You may also notice soft spots, cracked seams, or a musty odor that signals moisture has been trapped in the ceiling assembly. If the texture changes from firm to spongy, the material can lose strength quickly.
In water damaged ceiling repair, you need to treat discoloration near fixtures, corners, or joints as evidence of active intrusion, not normal aging. Don’t ignore small spots; they often spread behind the surface.
When you spot these symptoms early, you protect your home, your routine, and the people who share it.
Find the Leak Before Repairing
Before you repair a damaged ceiling, you need to pinpoint the moisture source, because patching the surface alone won’t stop the problem from returning. Start by tracing stains to the highest wet point, then inspect the attic, roofline, and nearby plumbing runs.
You’ll protect your home better when you verify the leak path, not just the visible damage.
- Check for cracked shingles or flashing gaps.
- Look for pipe joints, vents, and supply lines.
- Review bathrooms and fixtures above the ceiling.
- Note drip patterns and discoloration edges.
- Confirm the source before opening repairs.
If you belong to a community of careful homeowners, this step helps you save time, limit damage, and choose the right fix the first time.
Dry Out the Ceiling Safely
You should improve air circulation immediately by opening windows, running fans, and using a dehumidifier to move moist air out of the ceiling cavity.
Remove standing moisture promptly with towels, wet vacuums, or containment drain points if access allows, because trapped water accelerates drywall breakdown and mold growth.
Keep airflow continuous until the ceiling and insulation are fully dry, and don’t seal the area until moisture readings return to normal.
Improve Air Circulation
If the ceiling is still damp, improve air circulation right away to dry it safely and prevent further damage. You should create steady crossflow so hidden moisture can escape from the ceiling cavity and finish drying evenly.
Open nearby doors and interior vents.
Run ceiling fans on a low, constant setting.
Place box fans to move air across, not at, the wet area.
Keep HVAC supply and return paths unobstructed.
Maintain airflow for several hours, then reassess the surface.
You’re part of a community of homeowners who know that controlled drying protects finishes and supports a cleaner repair.
Good circulation helps reduce surface swelling, limits odor buildup, and prepares the ceiling for the next repair step.
Remove Moisture Promptly
Promptly remove moisture from the ceiling by stopping the source of water, then drying the affected materials as quickly and safely as possible.
You should shut off the leak, isolate the area, and protect the room below. Run fans and a dehumidifier to lower relative humidity, but don’t aim hot air directly at wet drywall, since that can trap moisture inside.
If insulation is saturated, you’ll need to remove it so the cavity can dry fully. Check for hidden dampness with a moisture meter, especially near seams, fasteners, and light fixtures.
If the ceiling is sagging, stained, or soft, you’re right to act now—delays invite mold and structural deterioration.
Drying it correctly helps you restore the space with confidence and keep your home safe.
How to Fix a Water-Damaged Ceiling
Start by stopping the source of water and confirming the ceiling is dry enough to repair, since any ongoing leak will undo the work. Then you can rebuild the damaged area with confidence.
Score loose paint, scrape away blistered material, and vacuum dust so the patch bonds cleanly. Use this process:
- Cut out softened drywall only where necessary.
- Seal stains with a stain-blocking primer.
- Apply joint compound in thin, even coats.
- Sand between coats for a flat finish.
- Match texture, then repaint the whole section.
You’ll get the best result when you feather each repair edge and let every layer cure fully.
If you’re working carefully, you’re already doing it right. A solid, well-sealed ceiling helps your home feel protected and complete again.
When to Replace a Water-Damaged Ceiling
You should replace a water-damaged ceiling when the damage has compromised the ceiling’s structural integrity, not just its finish. If you see persistent sagging, soft drywall, enlarged stains, cracking seams, or repeated bubbling after drying, the ceiling board has likely lost strength.
You’ll also need replacement when insulation stays saturated, mold has penetrated the material, or fasteners no longer hold securely. In these cases, patching won’t restore safe performance. Cut out all compromised sections, inspect framing for hidden deterioration, and install new ceiling material to match the surrounding assembly.
If the leak came from plumbing or roof failure, replace only after the source is fully corrected. Acting decisively helps you protect your home, your crew, and everyone who shares the space.
How to Prevent Ceiling Leaks
Preventing ceiling leaks starts with controlling the systems above the ceiling before damage shows up. You can protect your home by inspecting roofing, plumbing, and attic ventilation on a routine schedule.
When you stay proactive, you join the group of homeowners who catch problems early and avoid costly repairs.
- Seal roof flashing and replace damaged shingles promptly.
- Insulate pipes to reduce condensation and freezing.
- Clear gutters and downspouts so water drains away.
- Check supply lines, joints, and traps for seepage.
- Vent bathrooms and kitchens to limit moisture buildup.
You should also monitor staining, musty odors, and soft spots after storms.
If you spot active moisture, act fast and call a qualified technician before the leak spreads.
Frequently Asked Questions
How Much Does Water Damaged Ceiling Repair Typically Cost?
You’ll typically pay $200 to $1,500 for ceiling repair, depending on damage extent, material, labor, and moisture remediation. Bigger stains, sagging, or structural issues can push costs higher fast, especially if you need repainting.
Can I Paint Over a Water Stain After Repairs?
Yes, you can, but only after you’ve fully dried, sealed, and primed the stain; otherwise it’ll ghost through like a bruise. You’ll blend repairs cleanly and keep your ceiling looking unified.
How Long Should Ceiling Drywall Dry Before Patching?
You should let ceiling drywall dry 24 to 48 hours, longer if it’s still damp. Check with a moisture meter, then patch only when the core’s dry, firm, and odor-free.
Does Homeowners Insurance Cover Ceiling Leak Repairs?
Usually, yes—if you can prove a sudden covered loss caused the leak. You should verify your policy, because wear, neglect, and gradual seepage often aren’t covered, and you’ll strengthen your claim with photos.
When Should I Call a Professional for Ceiling Water Damage?
You should call a professional when you see stains, sagging, bubbling paint, or active dripping; they’ll assess hidden damage, pinpoint roof or plumbing leaks, and protect your home before the problem worsens.
Conclusion
By now, you know water damaged ceiling repair after leaks starts with stopping the source, then drying, removing damaged material, and patching with precision. If you skip any step, the problem can return with thunderous force. Inspect stains, softness, and sagging closely, because even minor damage can hide major structural issues. When the ceiling is compromised beyond repair, replacement is the safest choice. Stay proactive, maintain your roof and plumbing, and you’ll protect your home for years.