
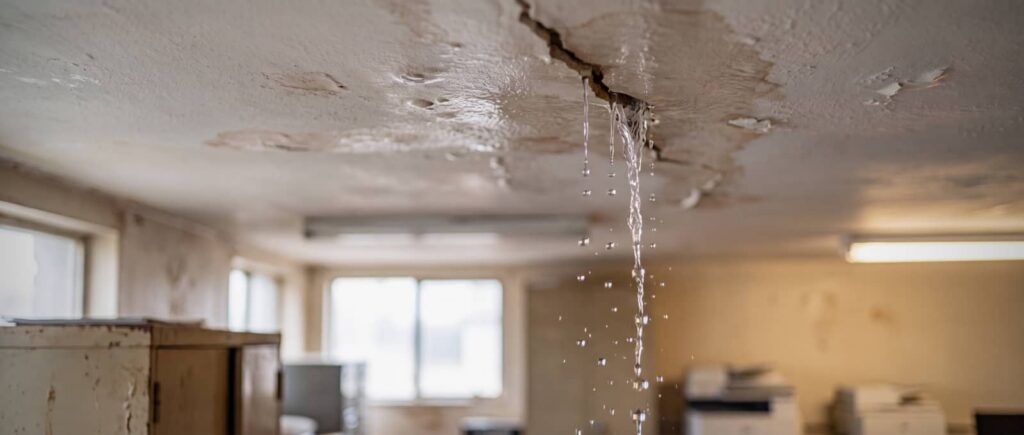
Many insured homes file a water damage claim each year, and a burst pipe can turn that risk into a fast-moving mess. You need to shut off the water and power, protect what you can, and start removing standing water right away. But the visible puddles are only part of the problem, and what hides inside walls, floors, and insulation can change everything next.
Key Takeaways
- Shut off the main water supply immediately to stop further flooding.
- Remove belongings, towels, and standing water to limit damage and safety risks.
- Turn off power if water reaches outlets, and avoid wet electrical areas.
- Document the damage with photos for insurance before restoration begins.
- Call a plumber or water damage professional to assess, dry, and repair the affected area.
What To Do First After a Burst Pipe
The moment you notice a burst pipe, shut off the main water supply to stop the leak from spreading.
Then move nearby furniture, rugs, and electronics away from the wet area so you can limit water damage from burst pipe leaks.
If standing water’s present, place towels or a wet vacuum on it, but don’t tear into walls or ceilings yet.
Take quick photos of the affected rooms, damaged materials, and the pipe itself for insurance and repair records.
Open cabinets and closet doors to help air circulate.
Keep children and pets out of the area so your household stays safe and organized.
You’re not alone here; acting fast and calmly gives your home the best chance for recovery.
Shut Off Water and Power
Locate your main shutoff valve and turn off the water immediately to stop more flooding.
If water has reached outlets, appliances, or wet flooring near electrical systems, cut power to the affected area at the breaker panel.
This quick action helps limit damage and keeps you safer while you assess the leak.
Locate Main Shutoff Valve
When a pipe bursts, you need to shut off the water fast, so head straight to your main shutoff valve and turn it off immediately.
If you’re unsure where it is, check near the water meter, in the basement, crawlspace, garage, or along an exterior wall. Look for a round wheel handle or lever on the main line entering your home.
Turn a wheel clockwise until it stops; rotate a lever a quarter turn so it sits perpendicular to the pipe. If the valve sticks, don’t force it. Call a plumber if needed.
Once it’s closed, open a nearby faucet to relieve pressure and confirm the flow has stopped.
You’ve got this, and quick action helps protect your home and your household.
Cut Electrical Power
If water from a burst pipe is spreading, shut off electrical power to the affected area right away if you can do so safely.
Move to the breaker panel only if floors are dry enough to avoid shock, and never stand in water while reaching for switches. If you can’t access the panel without risk, wait for a licensed electrician or emergency crew.
Turn off the circuit that serves wet rooms, appliances, and outlets.
Keep hands dry, use a flashlight, and avoid metal tools.
Tell everyone in your home or building to stay clear until power and moisture are checked.
This step protects you and your community of neighbors, family, and coworkers from hidden electrical hazards.
Once the area’s safe, you can focus on cleanup and drying with confidence.
Stop the Leak and Save Belongings
Rush to the main water shutoff and turn it off to stop the flow before the damage spreads. If the burst pipe is on a fixture line, close the nearest supply valve too. You’ll limit pressure, slow seepage, and protect the structure while you assess the room.
Next, move dry valuables, electronics, documents, and soft goods to a safe area. Work fast, but stay steady; heavy soaked items can tear or slip. Group belongings by what you can save immediately, then place towels or plastic under anything that must stay nearby.
If you’re dealing with a shared space or rental, let others know what’s happening so everyone can help. Quick action here keeps damage contained and gives your home the best chance to recover.
How to Clean Up Burst Pipe Water Damage
Start cleanup by removing standing water as quickly as you can with a wet/dry vacuum, mop, or pump. Then open windows and run fans to improve airflow.
Wear gloves and non-slip shoes, and shut off electricity to wet areas before you enter. Bag soaked debris, remove contaminated towels, and wipe hard surfaces with a disinfectant approved for household use. Work in sections so you can track progress and keep your space organized.
- Check moisture with a meter before moving forward.
- Lift area rugs and other salvageable items.
- Discard food, medicine, and porous items that touched dirty water.
If you stay methodical, you’ll limit damage and protect your household’s health. Keep notes and photos for your insurance claim, and call a restoration pro if odors, stains, or hidden water remain.
Dry Walls, Floors, and Insulation
Once the standing water’s gone, focus on drying every affected surface before mold can take hold. You’ll want to remove baseboards, open wall cavities where needed, and pull back wet carpet or padding so air can move freely.
Set up high-velocity fans and dehumidifiers, then keep windows closed to help equipment work efficiently. For drywall that’s soaked above the base, cut out damaged sections to speed drying and protect the rest of your home.
If insulation feels damp, remove it; wet insulation won’t dry well and can trap moisture against framing. Check floors for swelling, cupping, or soft spots, and dry them evenly to prevent warping.
Stay patient and keep the airflow steady; with the right setup, you can bring your space back together safely.
Signs of Hidden Water Damage
After a burst pipe, you may spot hidden water damage as discolored walls or ceilings that look stained, warped, or uneven.
You might also notice a musty odor, which often points to moisture trapped behind surfaces and possible mold growth.
If you see either sign, act quickly so you can limit structural damage and protect indoor air quality.
Discolored Walls Or Ceilings
If a wall or ceiling looks stained, yellowed, or darker than the surrounding area, you may be seeing hidden water damage from a burst pipe. You don’t need to panic, but you should act quickly and document the affected area.
Water often wicks through drywall and paint, leaving irregular edges, bubbling, or a faint tide line that signals moisture behind the surface.
- Check whether the discoloration expands after a few hours.
- Press lightly for softness or warping.
- Mark the edges so you can track changes.
These signs help you spot active damage before repairs get bigger. When you notice them, shut off the source, protect nearby belongings, and call a qualified restoration professional.
You’re not dealing with this alone, and prompt attention can keep the room safe and recoverable.
Musty Odors And Mold
A musty smell often means moisture has lingered inside walls, floors, or insulation long enough for mold to start growing. You may not see damage yet, but your nose can detect hidden leaks early.
If the odor gets stronger in one room, check baseboards, drywall, carpets, and cabinets for dampness. Mold needs moisture, organic material, and time, so any burst-pipe area that stayed wet deserves careful inspection.
Run fans, dehumidifiers, and HVAC only after you’ve removed standing water and verified the source is fixed. If the smell persists after drying, call a qualified restoration pro to test for mold and remove contaminated materials safely.
Acting fast protects your home, your air quality, and everyone who lives there.
When to Call a Restoration Pro
When should you bring in a restoration pro? Call one if water keeps spreading, you smell hidden dampness, or the leak hit walls, ceilings, or flooring you can’t fully inspect. You’ll save time and reduce risk when you act early.
A trained team helps you make sense of the damage and keeps your space moving toward normal.
- You can’t locate every wet area safely.
- The water has reached electrical, insulation, or structural materials.
- You notice soft surfaces, discoloration, or persistent humidity.
You don’t have to manage this alone. Restoration pros use moisture mapping and targeted drying to verify what’s affected and what isn’t.
That kind of precision protects your home and helps your household get back to feeling settled again.
What Burst Pipe Restoration Includes
Burst pipe restoration usually starts with emergency water removal, then moves into moisture detection, drying, cleaning, and repairs.
You’ll see technicians extract standing water, map hidden dampness with meters, and set up air movers and dehumidifiers to control moisture fast.
They’ll remove soaked materials that can’t dry safely, then clean and sanitize affected surfaces to reduce odors and microbial growth.
If water reached drywall, insulation, flooring, or trim, they’ll assess what can be saved and what needs replacement.
You stay informed through each step, so you know what’s happening and why.
Good restoration teams document damage for insurance and keep the work area organized, helping your home feel manageable again while they return it to a safe, dry condition.
How to Prevent Another Burst Pipe
To help prevent another burst pipe, you’ll want to reduce the conditions that stress plumbing in the first place. Keep indoor temperatures steady, especially near exterior walls, and insulate exposed pipes in basements, crawlspaces, and attics.
You should also let faucets drip during hard freezes so pressure doesn’t build up.
- Inspect for corrosion, leaks, and weak joints each season.
- Seal drafts around plumbing penetrations and cold-air gaps.
- Schedule prompt repairs for aging valves, fittings, and damaged pipe sections.
If you belong to a neighborhood with harsh winters, compare notes with trusted neighbors and share freeze-prevention tips.
After any previous break, ask a licensed plumber to check pressure, insulation, and pipe condition. That small investment can protect your home, your routine, and your peace of mind.
Frequently Asked Questions
How Do I Document Burst Pipe Damage for Insurance Claims?
Photograph every damaged area, damaged item, and the pipe itself, then video the scene. List dates, times, repairs, and receipts. You’ll support your claim best when you organize everything and notify your insurer quickly.
Will My Homeowners Insurance Cover Mold After a Burst Pipe?
Usually, yes, if you act quickly; your policy may cover mold from sudden pipe damage. Like a small leak becoming a hidden river, you need prompt drying, documentation, and professional remediation to protect your claim and home.
How Long Does It Take for Burst Pipe Repairs to Finish?
You’ll usually wait 1–7 days for minor repairs, but structural drying, drywall replacement, and inspections can stretch it to 2–4 weeks. You can speed things up by acting quickly, documenting damage, and coordinating approvals.
Can a Burst Pipe Affect My Home’s Foundation?
Yes, a burst pipe can affect your home’s foundation if water saturates soil or pools near footings. You should shut it off, dry areas fast, and call a professional to assess damage and prevent shifting.
Should I Test Water Quality After a Burst Pipe Leak?
Yes—you should test it, because “clear” water can still hide trouble. You’ll protect your home and family, confirm safety, and guide cleanup. If you’re unsure, call a certified lab or plumber.
Recap
When you act fast after a burst pipe, you limit damage and speed recovery. You shut off the water, clear standing water, and dry hidden moisture before it spreads. If you spot warped walls, musty smells, or dripping insulation, call a restoration pro right away. Coincidentally, the same prevention steps that protect your plumbing now—insulation, maintenance, and routine checks—also save you time, stress, and money next time.